How to enable TLS 1.2 in Outlook 2007 or 2010 on a Windows 7
TLS (Transport Layer Security) is an encryption protocol that provides secure communication over a network, typically the internet.
As a step forward in security improvements, many of the ISP (Internet Service Providers) are these days disabling non-encrypted and earliest versions of TLS (1.0 and 1.1) when connecting to their email servers in order to receive or send email messages.
Normally, with a relatively modern computer/device with an up-to-date OS and email client software, you should not have any trouble and can make it work with just enabling the secure connection option in your email account setup.
But for those working with Outlook 2007 or Outlook 2010 on an old Windows 7 computer, things are not so easy, and they can get constantly a “server does not support the specified connection encryption type” error when trying to enable the secure connection options.
For those ones, here I leave this steps to follow in order to have TLS 1.2 working.
1.- Requirements
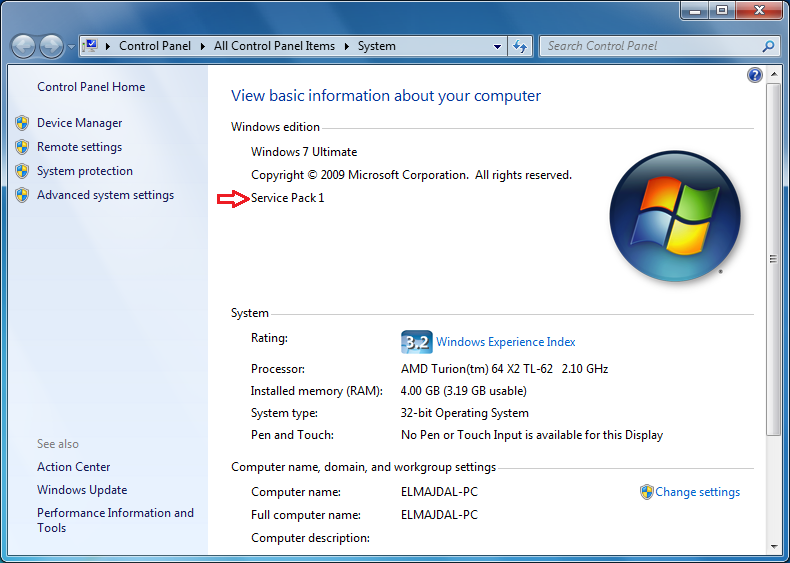
Be sure you have one of these OS versions running on your computer: Windows Server 2012, Windows 7 Service Pack 1 (SP1) y Windows Server 2008 R2 SP1 (these are the versions which do not have the TLS 1.2 implemented by default).
If you don’t know which OS versión you have in your system so:
- Click the Start or Windows button (usually in the lower-left corner of your computer screen).
- Right-click Computer and choose Properties from the menu. The resulting screen shows the Windows version.
If you don’t have the Service Pack 1 update, try to intall it using the Microsoft Update service of your operative system.
2.- Install the Windows KB3140245 update
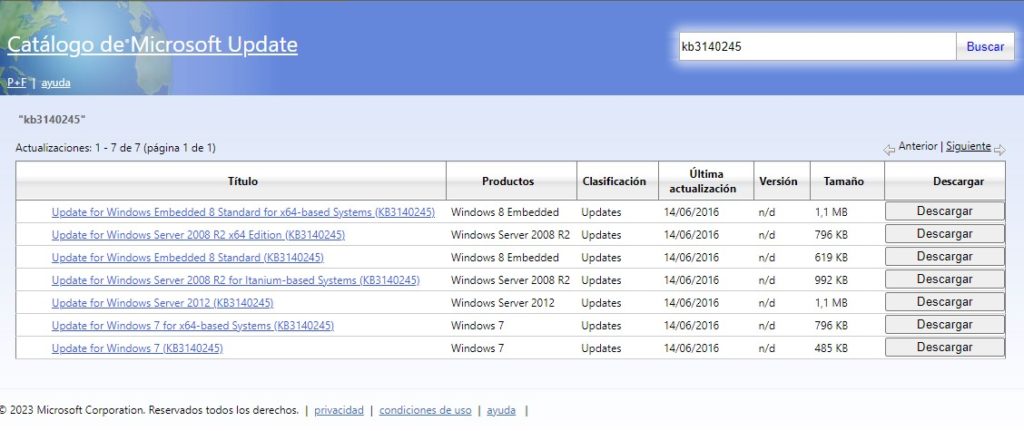
This is an update that usually appears as an optional one when updating your system with the Microsoft Update service, so it is probable that you did not install it if you install only important updates by your default setup.
To install it go to https://catalog.update.microsoft.com/search.aspx?q=kb3140245 and download the pack which fits your OS.
3.- Execute the EasyFix 51044
Next you will need to download and install the MicrosoftEasyFix51044.msi file on your computer, which can be found at https://download.microsoft.com/download/0/6/5/0658B1A7-6D2E-474F-BC2C-D69E5B9E9A68/MicrosoftEasyFix51044.msi .
The SecureProtocols registry entries that have value 0xA80 for enabling TLS 1.1 and 1.2 will be added in the following paths:
HKEY_CURRENT_USER\Software\Microsoft\Windows\CurrentVersion\Internet SettingsHKEY_LOCAL_MACHINE\SOFTWARE\Microsoft\Windows\CurrentVersion\Internet Settings
4.- Enable TLS 1.2 on Windows 7 at the SChannel component level
The key step (not mentioned in some posts) is that you need to create manually the necessary subkeys for TLS 1.2, the DisabledByDefault entry in the appropriate Client subkey and set it to 0 at the SChannel component level.
For that:
- Open the Registry Editor by executing
regedit.exe. - Navigate until the
HKEY_LOCAL_MACHINE\SYSTEM\CurrentControlSet\Control\SecurityProviders\SCHANNEL\Protocols\location. - Right-click on that
Protocolsfolder and selectNewoption >Key. - Type the name
TLS 1.2and pressEnter. - Then right-click on the folder named
TLS 1.2and selectNew>Key. - Rename the new key with the name
Clientand pressEnter. - Again right-click the
Clientkey and this time selectNew > DWORD Value (32-bit). - Rename the new value and type
DisabledByDefault. - Double click the
DisabledByDefaultand on the new window opens ensure that theValue datais set to0and theBaseisHexadecimal. ClickOK.
Once you have done this, close the registry editor window and make sure to reboot your machine in order to make changes effective.
After the reboot your system will be able to communicate with the TLS 1.2.
That’s it! I hope you found this post useful. Feel free to leave your feedback.
Carlos Pérez
Digital manager, tech lead, product designer, full stack engineer, web and app developer, SEO, digital marketing, automation and AI expert.






Leave a Reply