


Fortunately, nowadays there are other ways to check and repair the system files of your Windows 10 or 11 device different to the always risky reinstallation of the operative system, which was the only way to do it in the older Windows versions.
Here you are some very easy (and quite fast) commands to do it.
To execute them, open first an elevated command prompt with administrator privileges. There are different ways to do this. Here there is a pair:
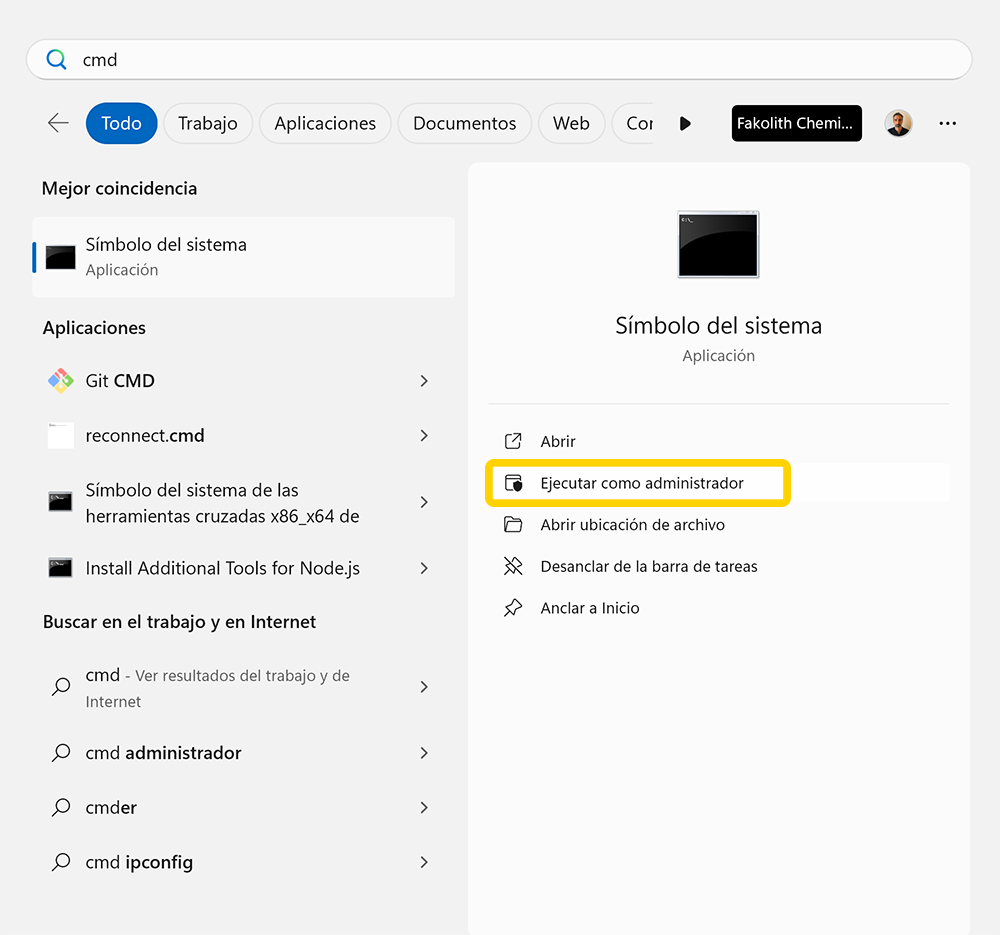
- Search for
cmdon the search dialog box of the system. When the app appears click on the option toRun as administrator.
- Or press
Win + R> typecmd> pressCtrl + Shift + Enter
Once the command terminal is open, execute by this order the following commands, one at a time:
Dism /Online /Cleanup-Image /CheckHealth
Dism /Online /Cleanup-Image /ScanHealth
Dism /Online /Cleanup-Image /RestoreHealth
sfc /scannow
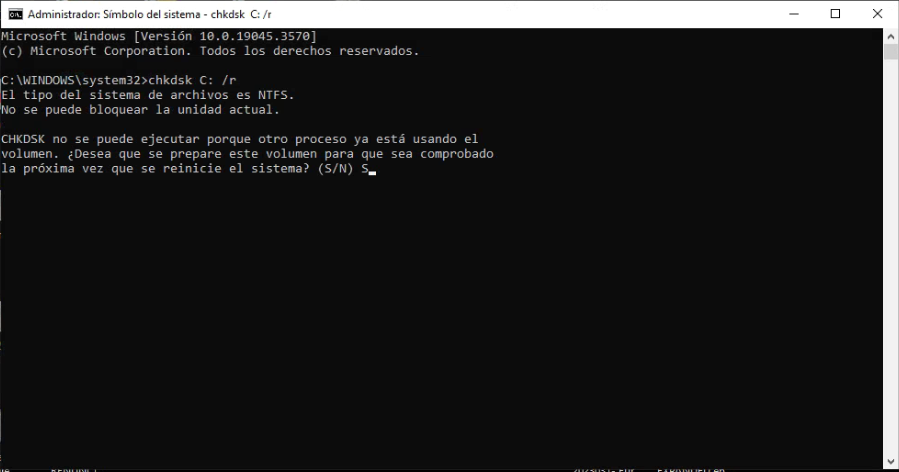
chkdsk C: /rOnce you try to execute the last one, the system will ask you if you want to program that checking of the file system next time you restart the system. Answer yes and reboot the computer for the checking and repairing to take effect.
Once the system is rebooted, the checking is done. To see the results of this last checking you will need to:
- Open the
Event Viewer, for example withWin + X>Event Viewer. - Select on the left menu
Windows log>Application. - Search for the last
Wininitevent. - Check the details of the event to see the results of the
chkdskcommand.

With these steps you can fix any problem of corrupted or lacking file of your windows operative system.
Hope this post is helpful. Feel free to send me your feedback.


Leave a Reply