


Hello everyone! Today, we’re diving into a solution that many of you have been searching for: implementing the new Google Consent Mode v2 on a WordPress site.
These last few weeks there has been a lot of movement regarding this topic, as in March 2024 it has started to become mandatory to align your website to this new Google Analytics and Google Ads requirement, defined under the pressure of the effects of the European GDPR legislation.
After some meetings with Google team and researching on my own, testing different plugins, comparing functionalities, prices, etc…. I came to this solution that I believe can meet the needs of any small or medium website.
Video tutorial
Here you have a video tutorial explaining every single step to achive having this solution running on your website.
Method 1: Setting up a WordPress plugin
For those of you who manage WordPress sites, you know the struggle of finding a robust yet free plugin that not only manages cookies but also supports Google Consent Mode v2 and offers multilingual options.
In this tutorial, I’ll walk you through how to install and configure the CookieYes plugin.
CookieYes is a comprehensive platform that scans, classifies, and lists the cookies present on your website. It’s a fantastic tool because it prepares the cookie consent banner in accordance with various legal standards applicable in different regions around the world. This feature is particularly important as it helps ensure that your website complies with the latest cookie laws, avoiding potential legal pitfalls.
Install the plugin
We’ll start by installing the CookieYes plugin directly from the WordPress plugin repository.

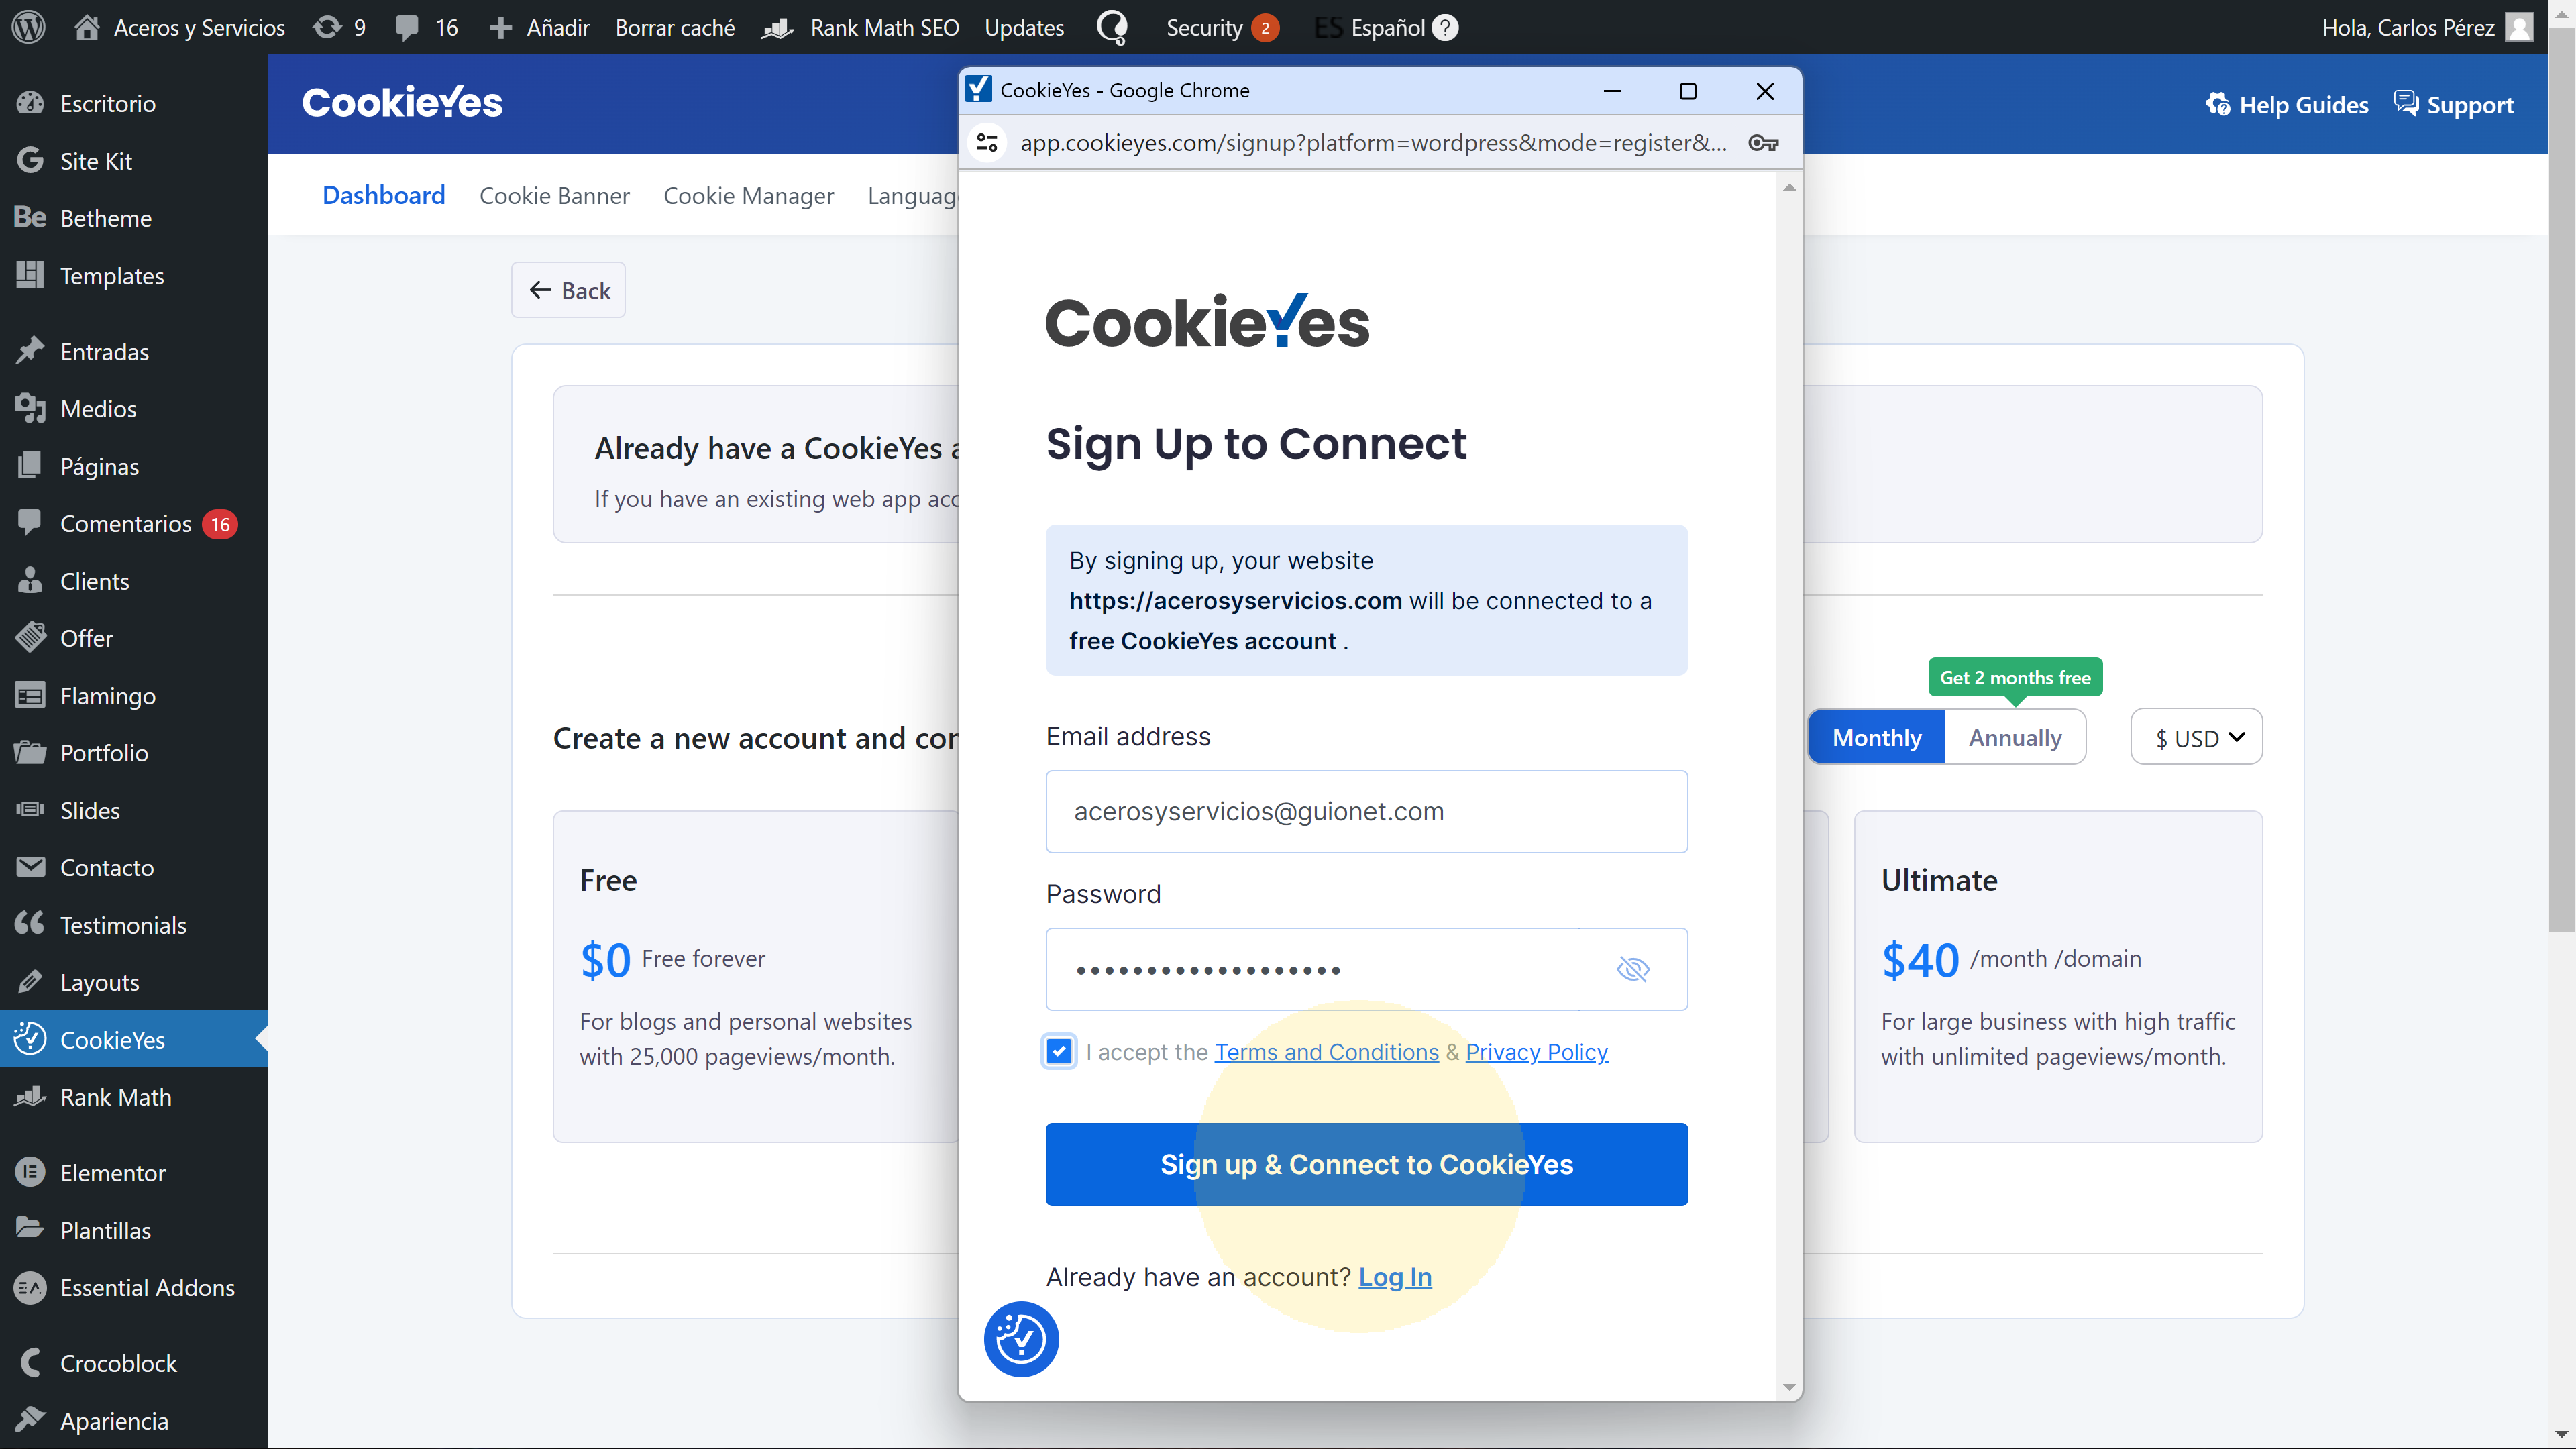
Create a free CookieYes account
Once installed, activate it and go through the initial setup.
For that you will need to create an account for the platform. You can create the new free account here or from the same plugin setup.
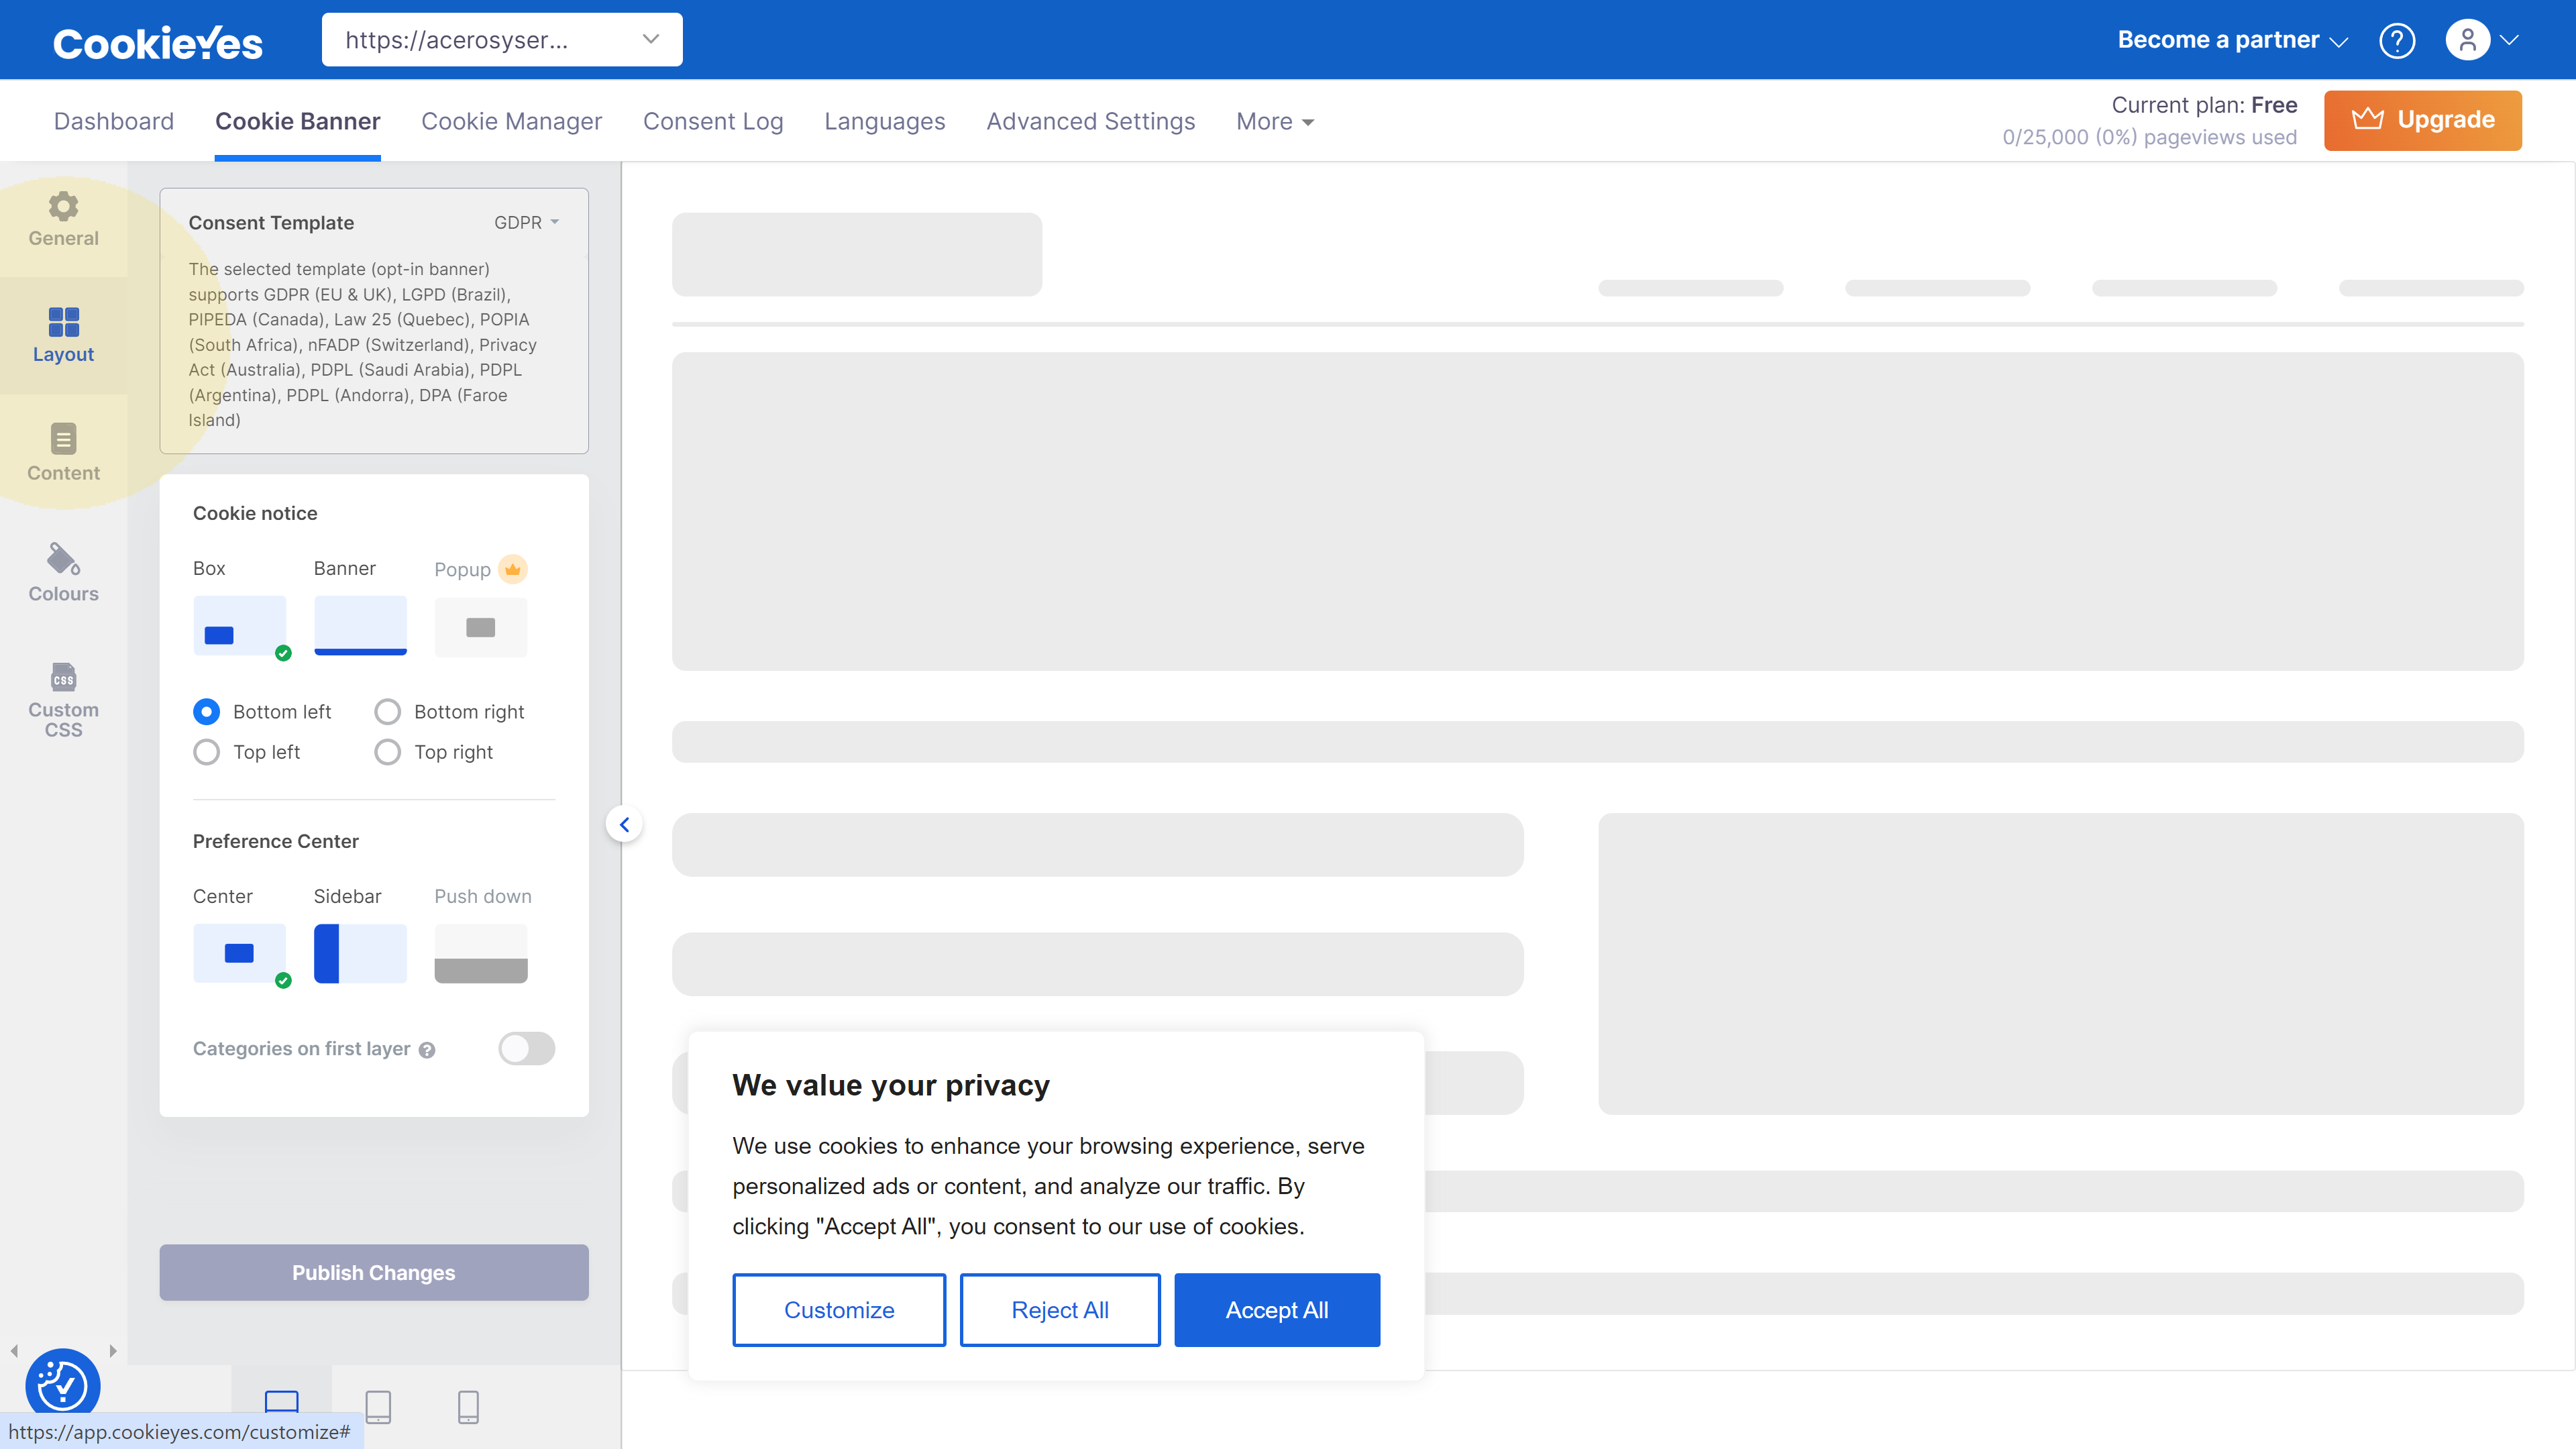
Setting up the banner options
Once you have already logged into the CookieYes platform with your account, you can setup the different layout and languages options for the cookie banner.
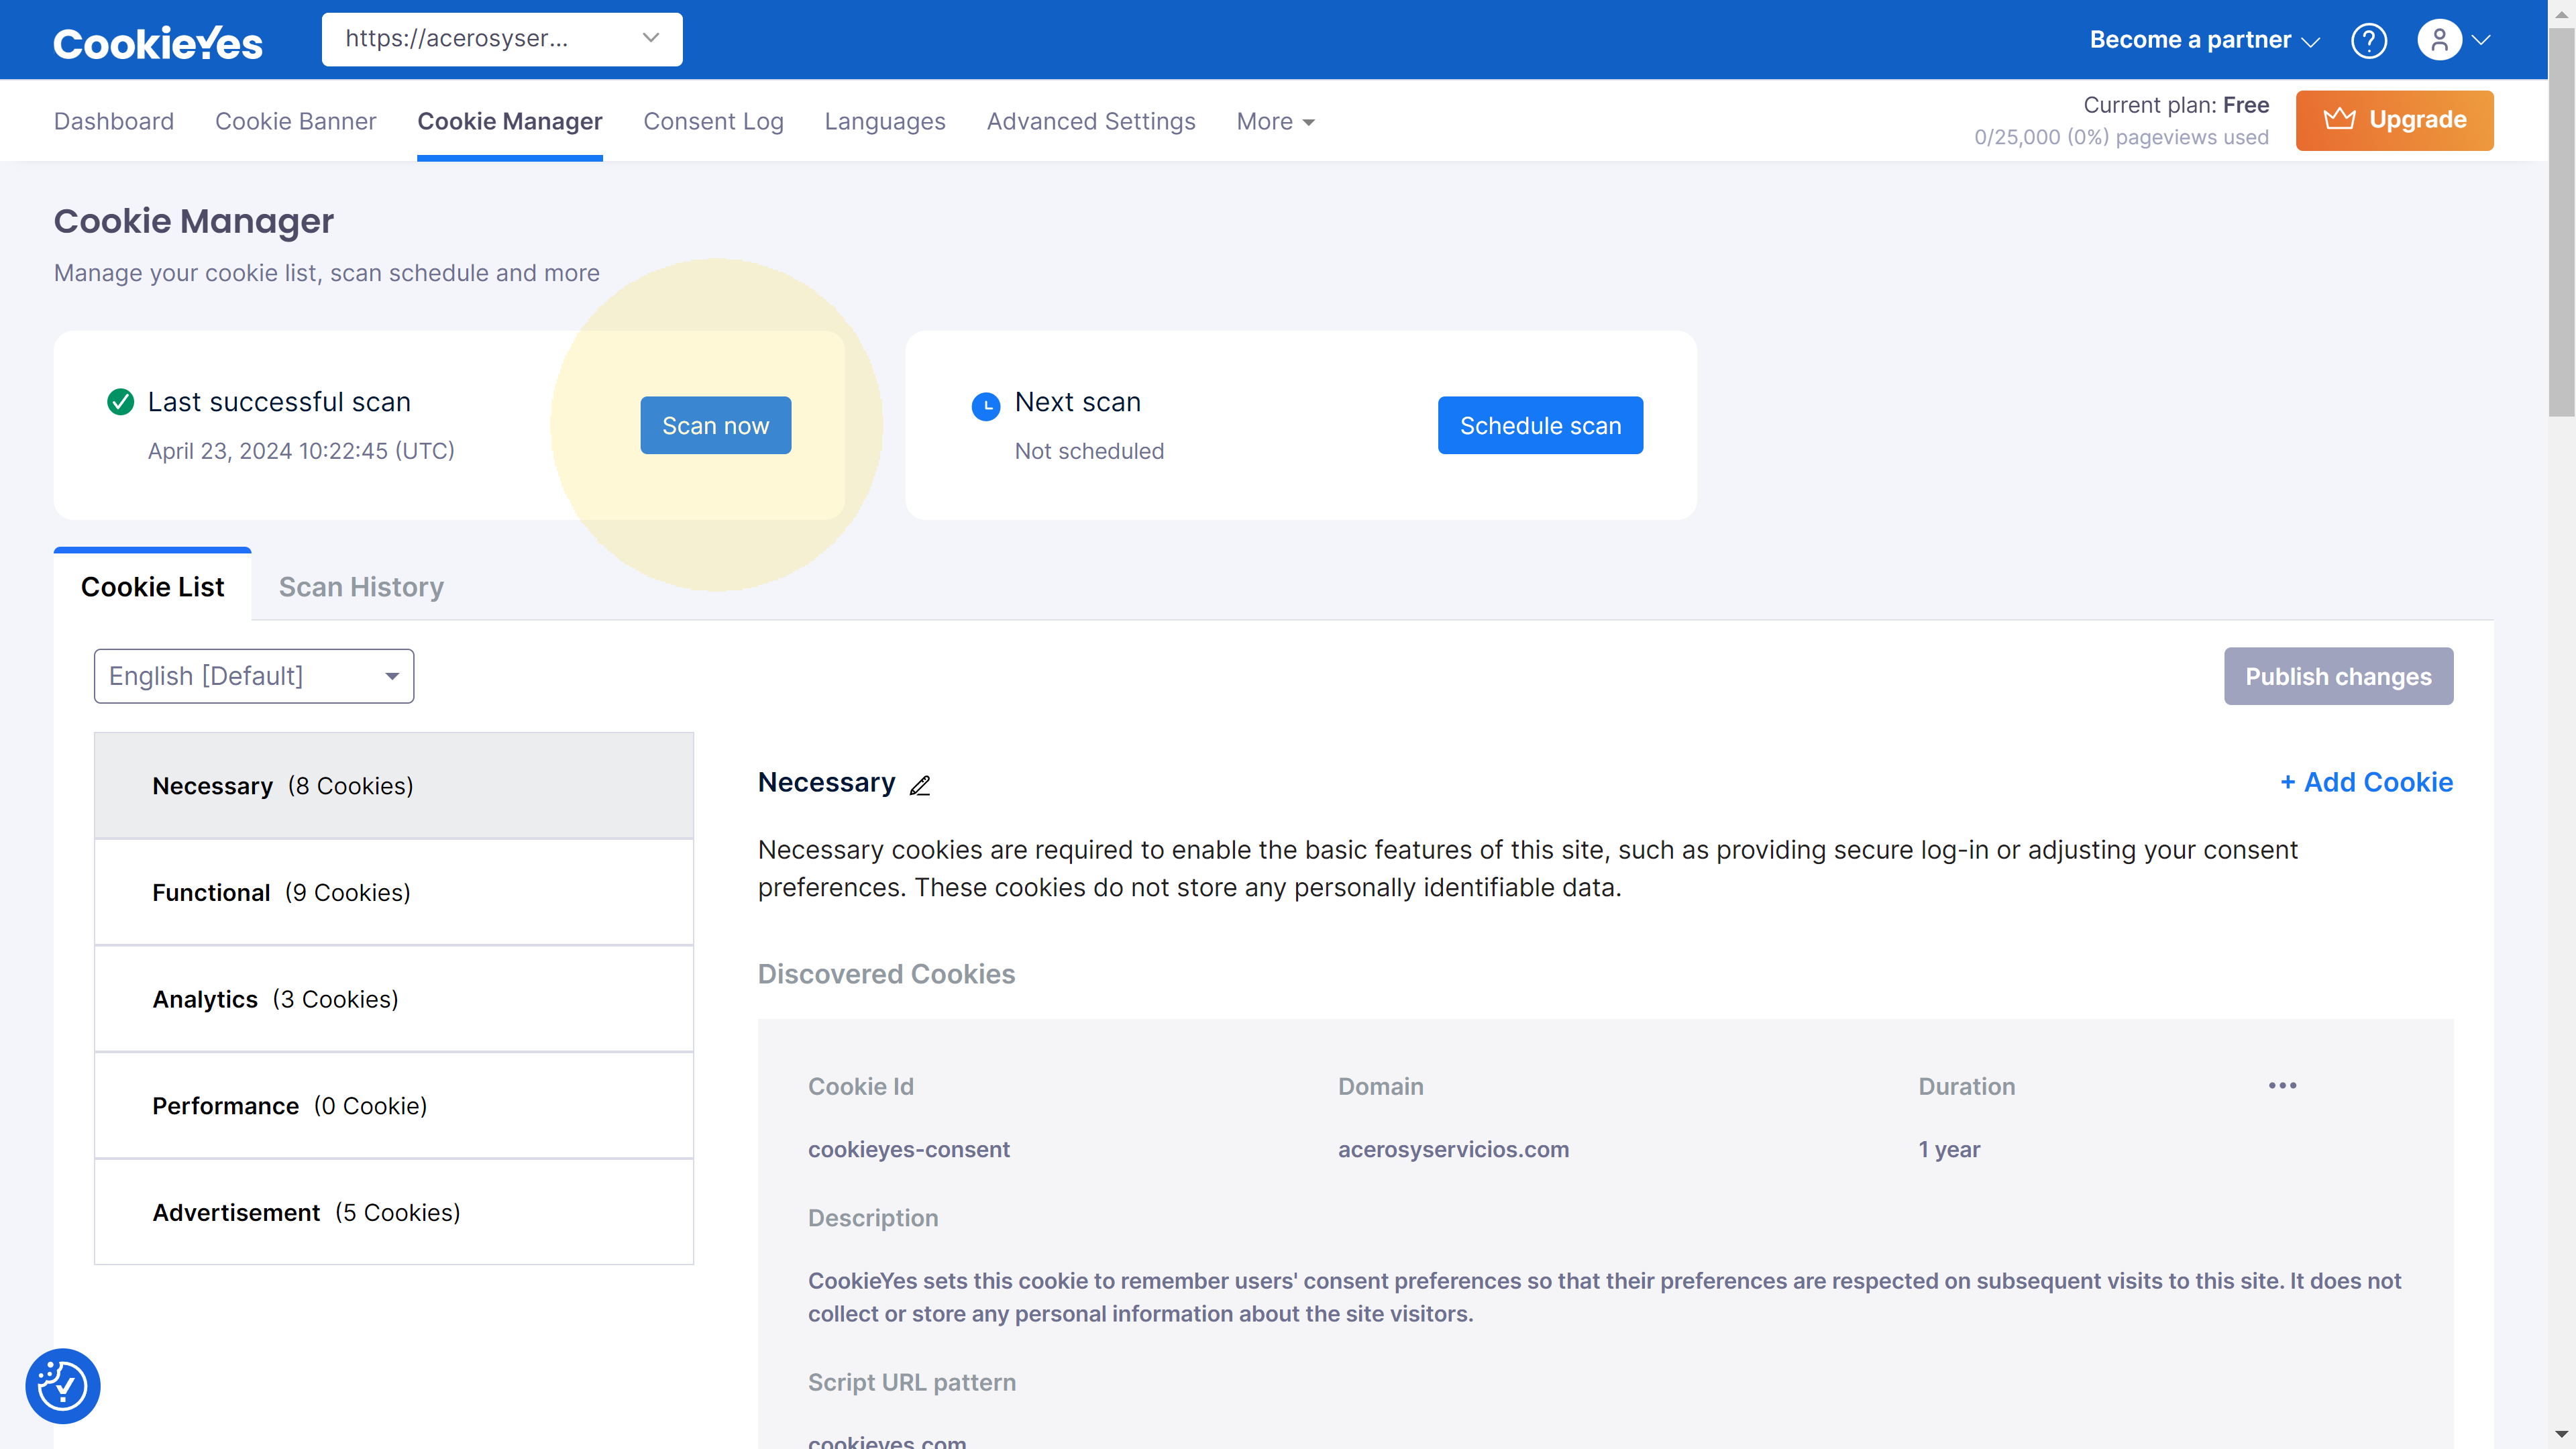
Scan your website cookies
Next step is scanning your website for existing cookies. CookieYes automatically categorizes these cookies, making it easier for you to manage consent preferences effectively.
Check that the cookie banner is active
Next, we’ll browse our website to ensure that it is already working and the cookies are shown in each of the purpose categories.

Method 2: Setting up a tag in Google Tag Manager
For those who manage not WordPress sites or just don’t want to install any more WP plugins, you can achieve the same result by this other method,
We just need to create a new tag in our Google Tag Manager container, with the CookieYes template (available from the same Google Tag Manager) and the CookieYes website key.
The first steps are common to the Method 1 (you can check their instruction above):
- Create a free CookieYes account at the platform website.
- Setup the banner options.
- And scan your website cookies from the platform.
Copy the CookieYes website key
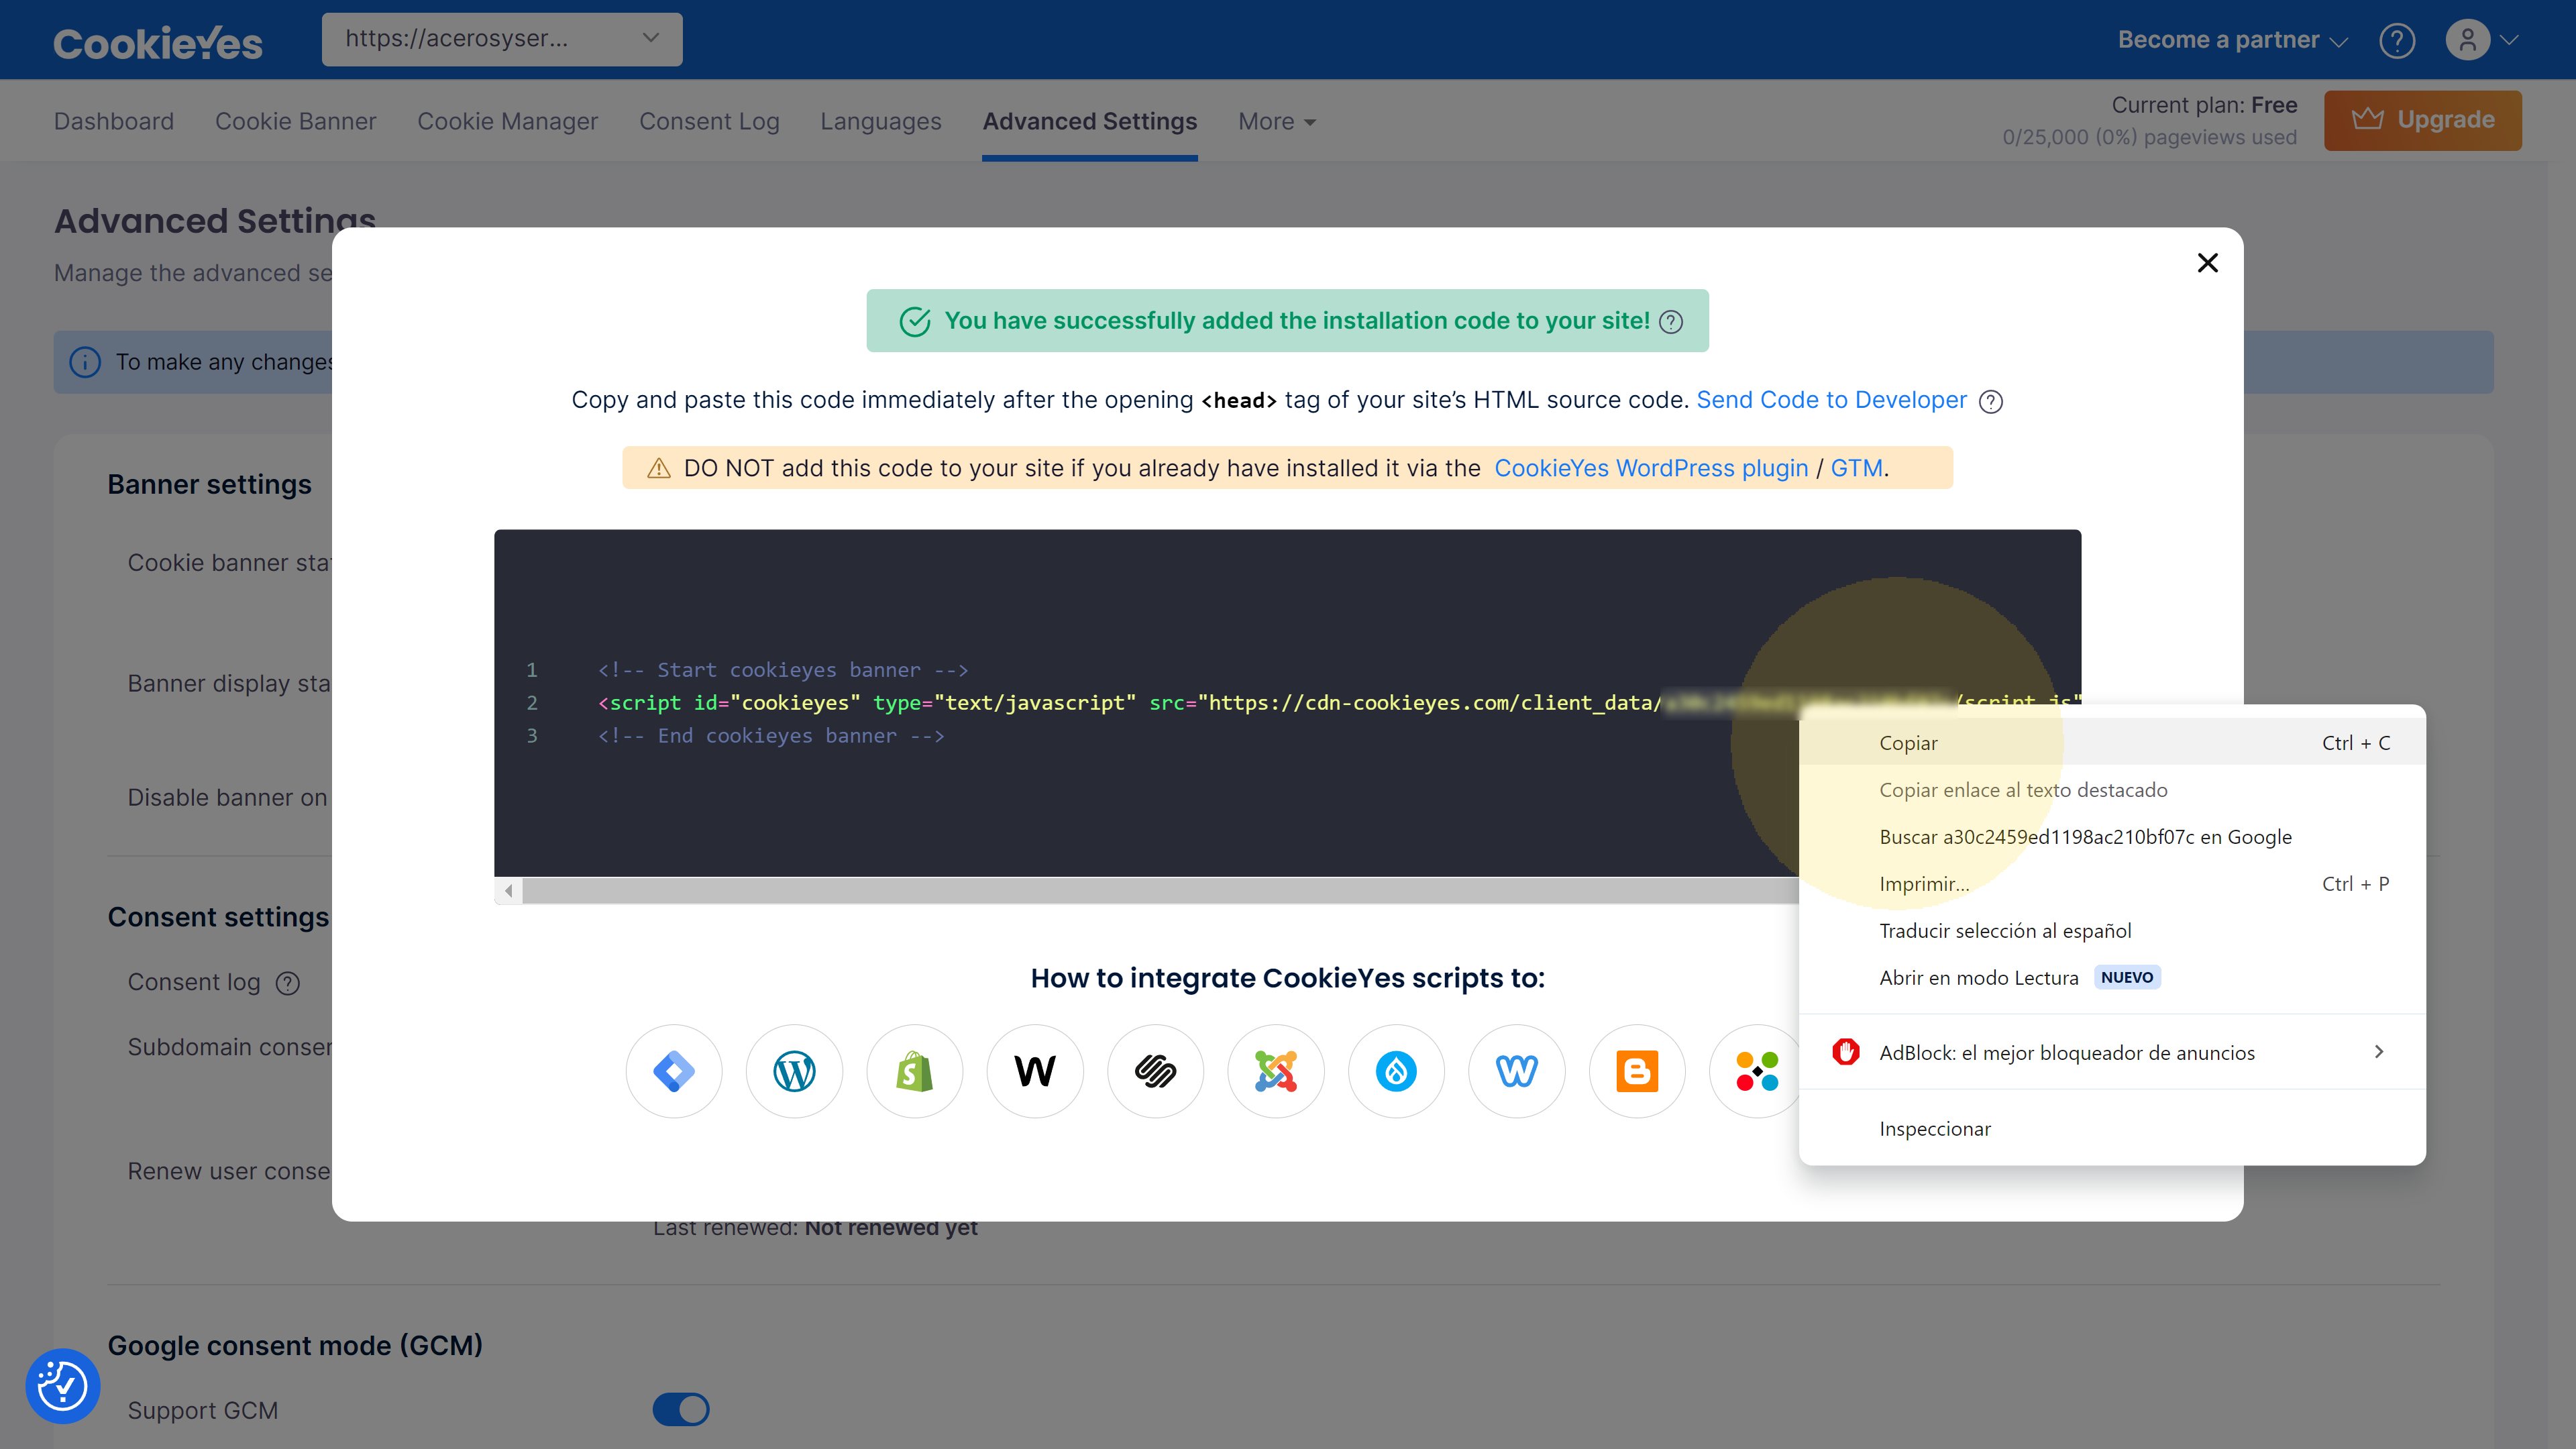
In the CookieYes platform, we go to the Advance Settings tab. There we will find a blue Get installation code button. By pressing it, a pop-up window appear, with a code on a dark background.
From it, the only data that we need is the {website key} which is inside that code, in a script source reference, in a format like this:
<!-- Start cookieyes banner -->
<script id="cookieyes" type="text/javascript" src="https://cdn-cookieyes.com/client_data/{website key}/script.js"></script>
<!-- End cookieyes banner -->
Create the Consent Mode tag
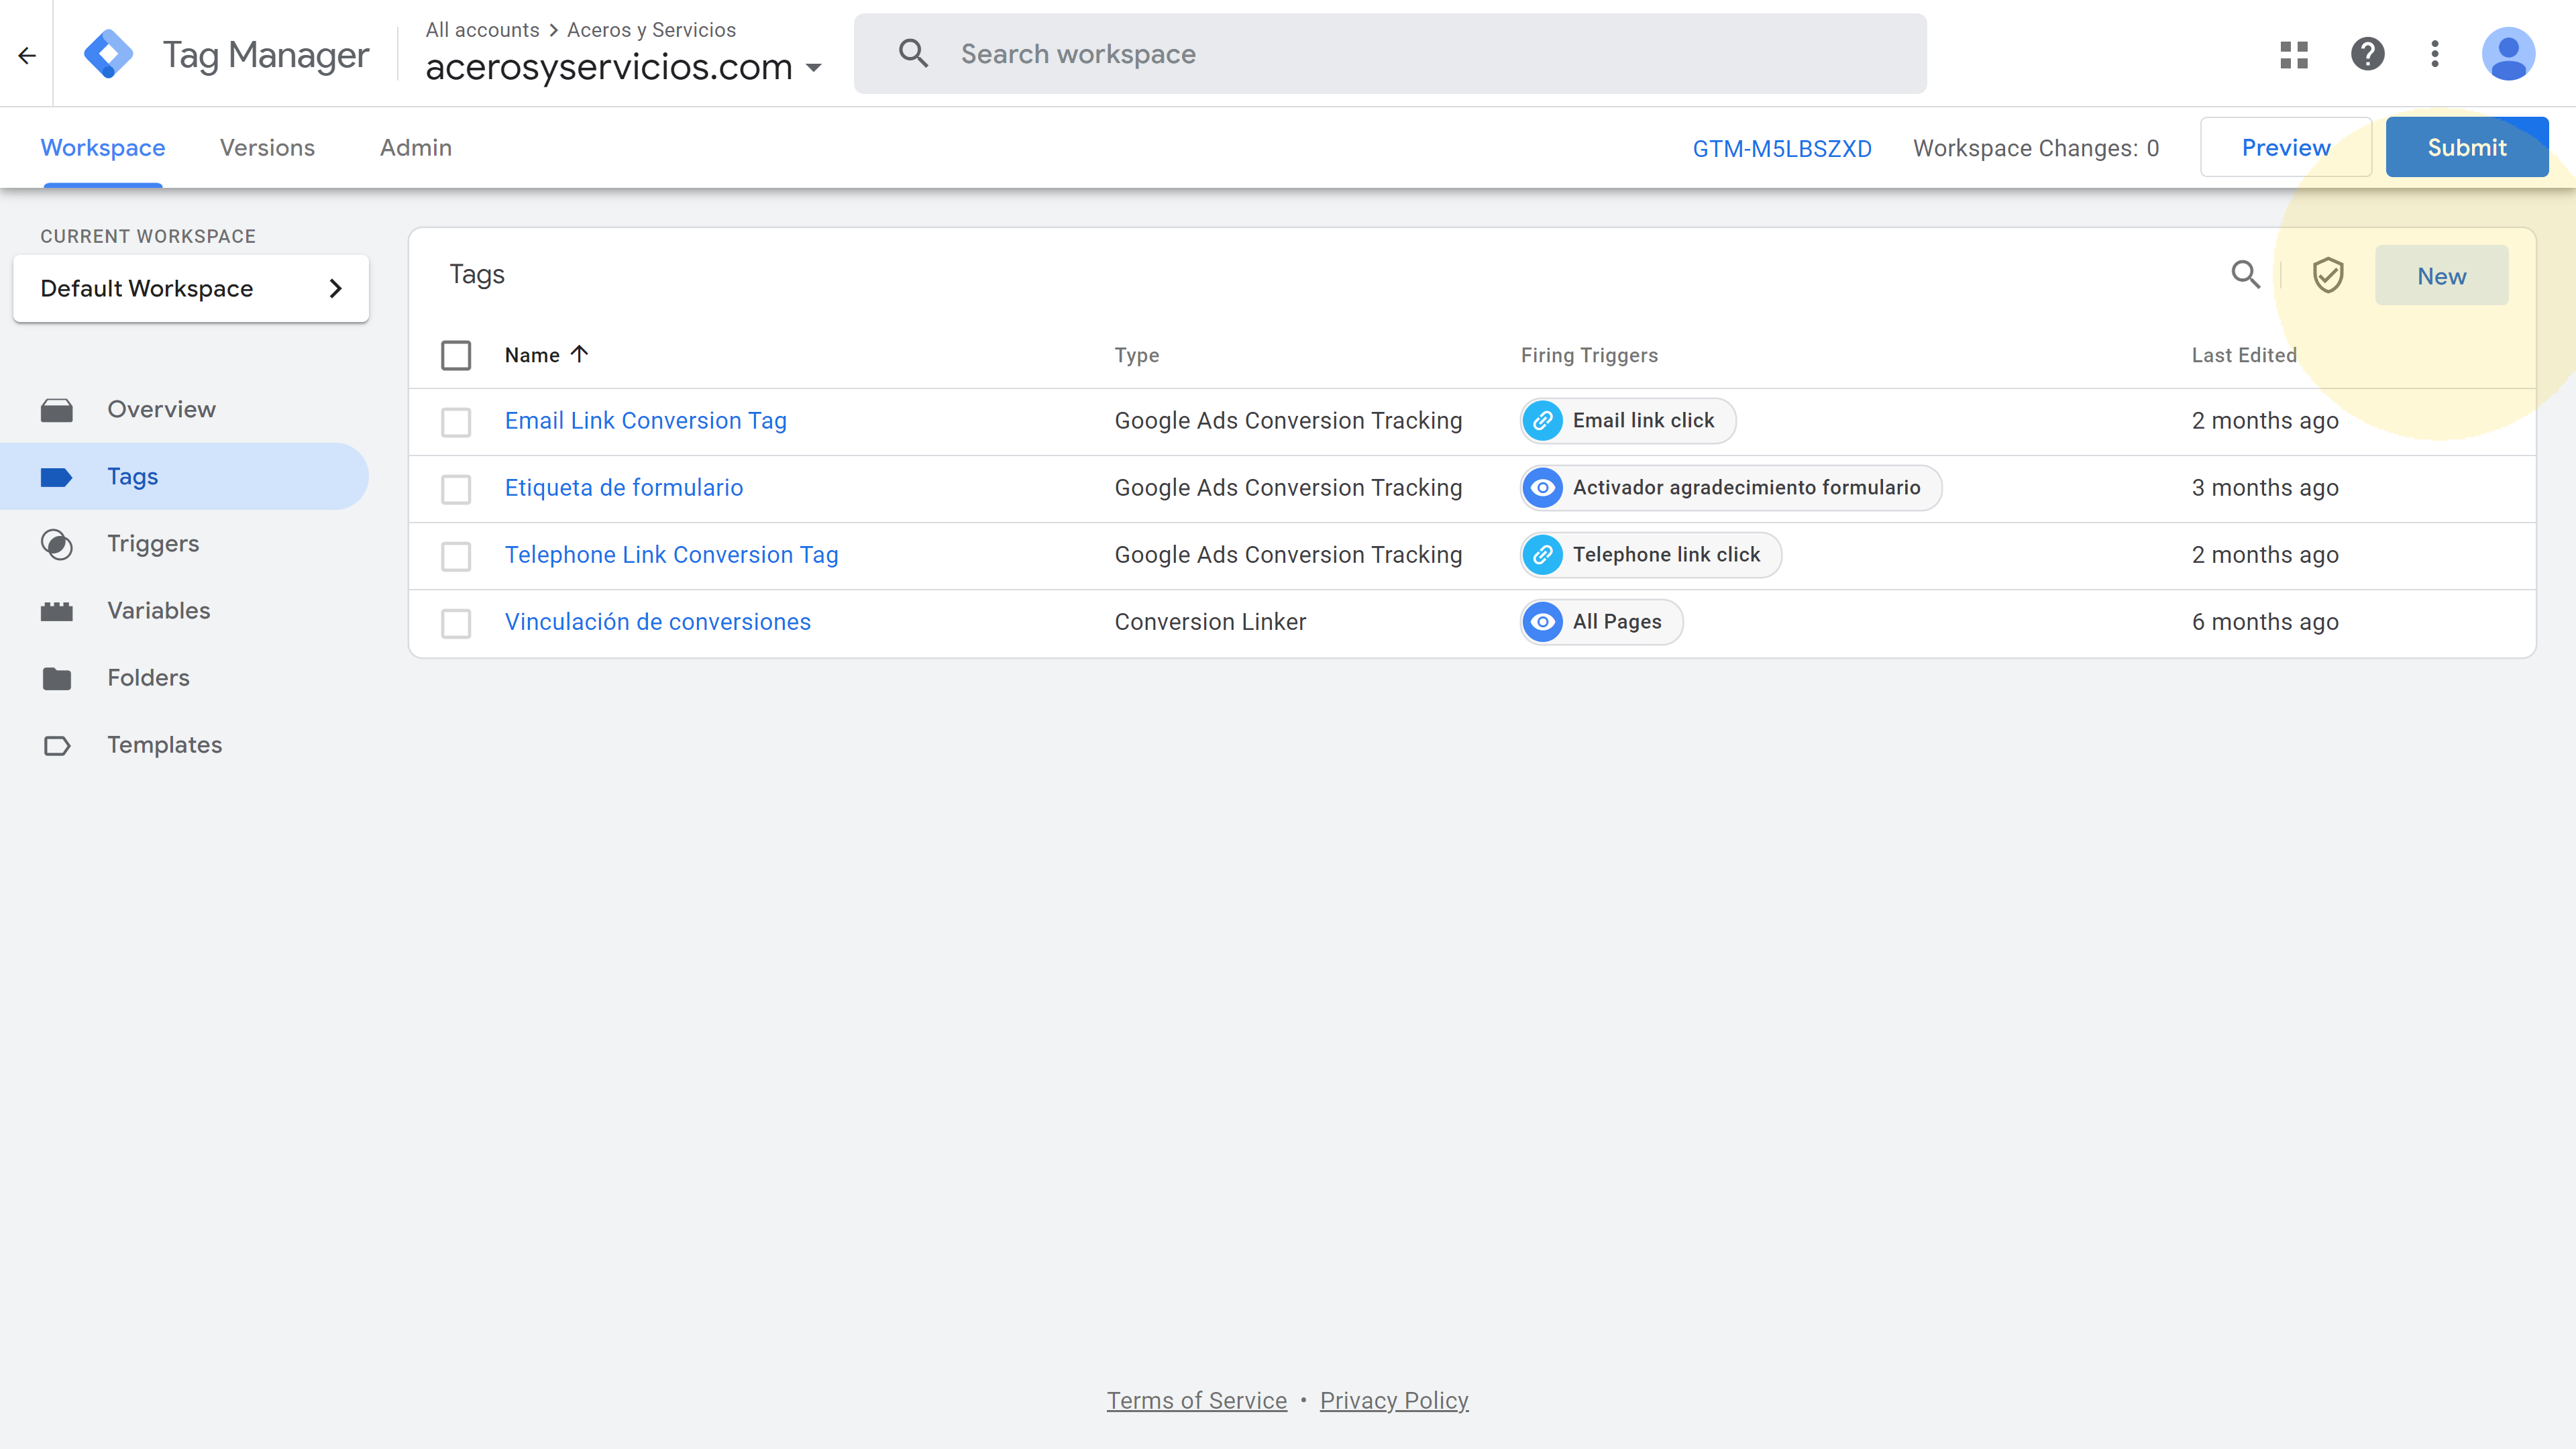
Access to your Google Tag Manager account linked to your website. Enter into the Tags section on the left menu. And press on the New button to start creating the tag.
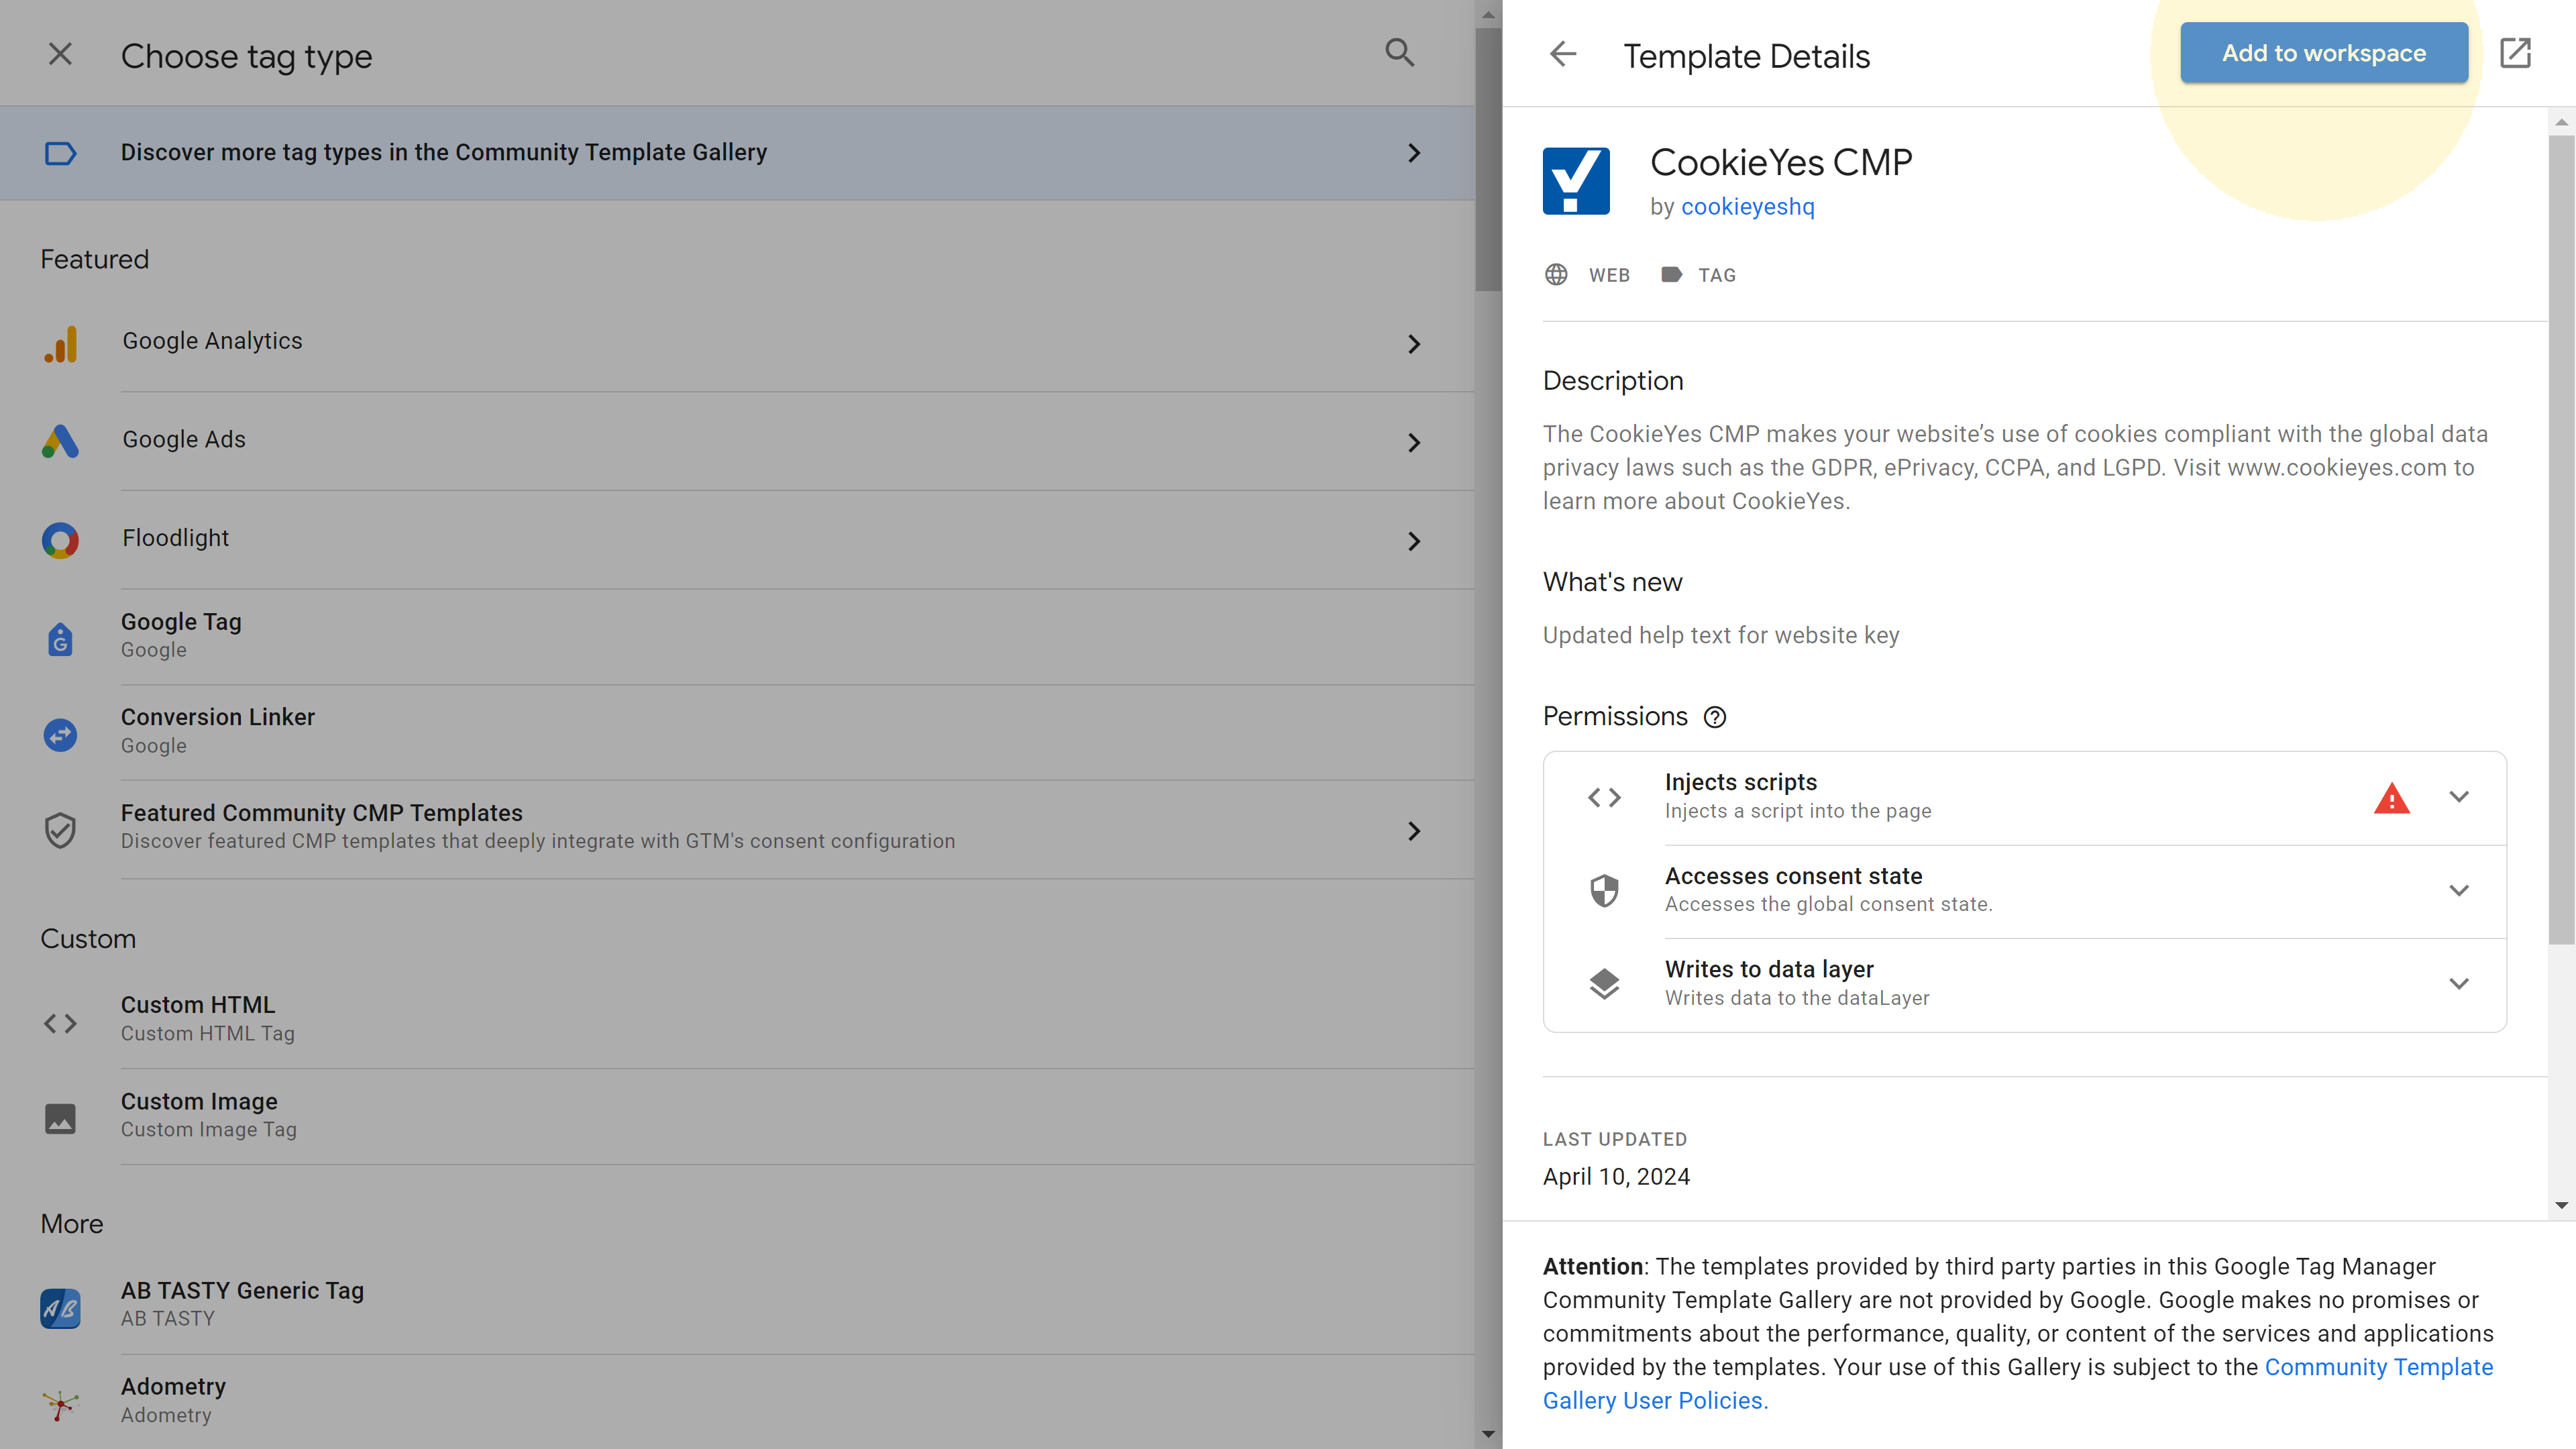
In the Tag Configuration section, select Discover more tag types in the Community Template directory, and in the next list of templates search for one called CookieYes CMP and later press on the Add to workspace button.
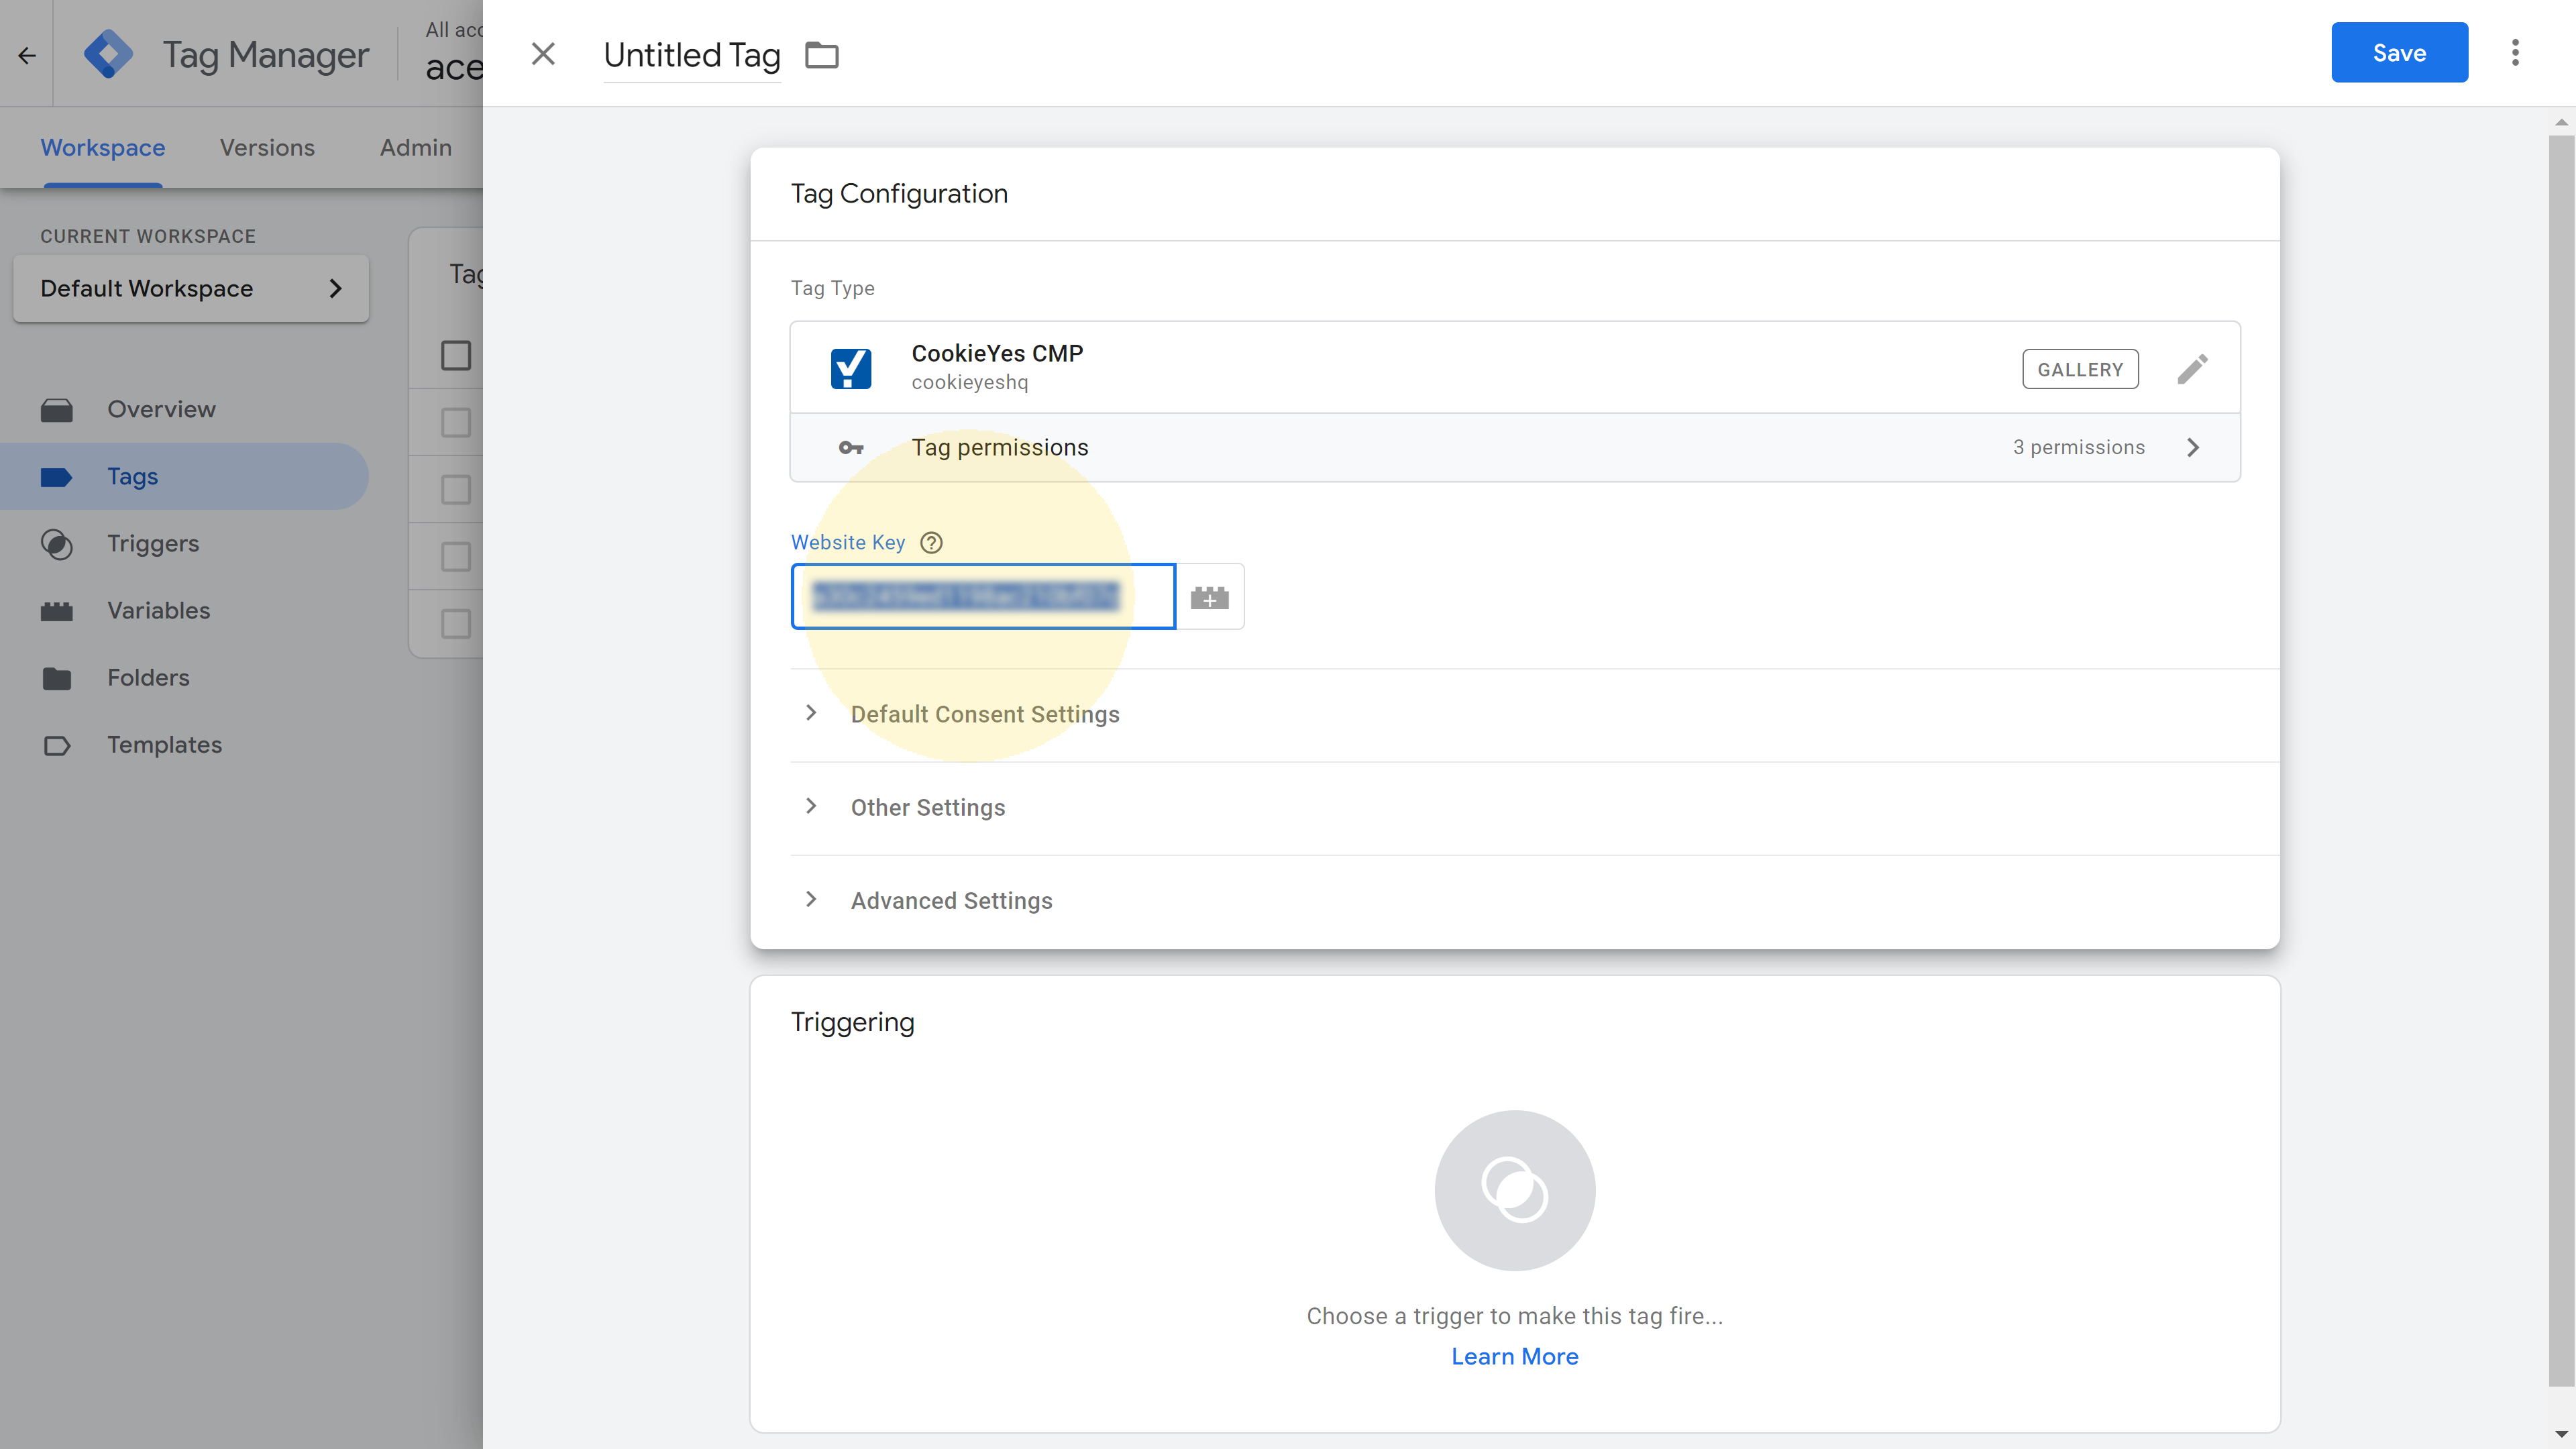
Once the tag type is added to the Tag Configuration section, it will ask us that {website key} that we copied before. Paste it here.
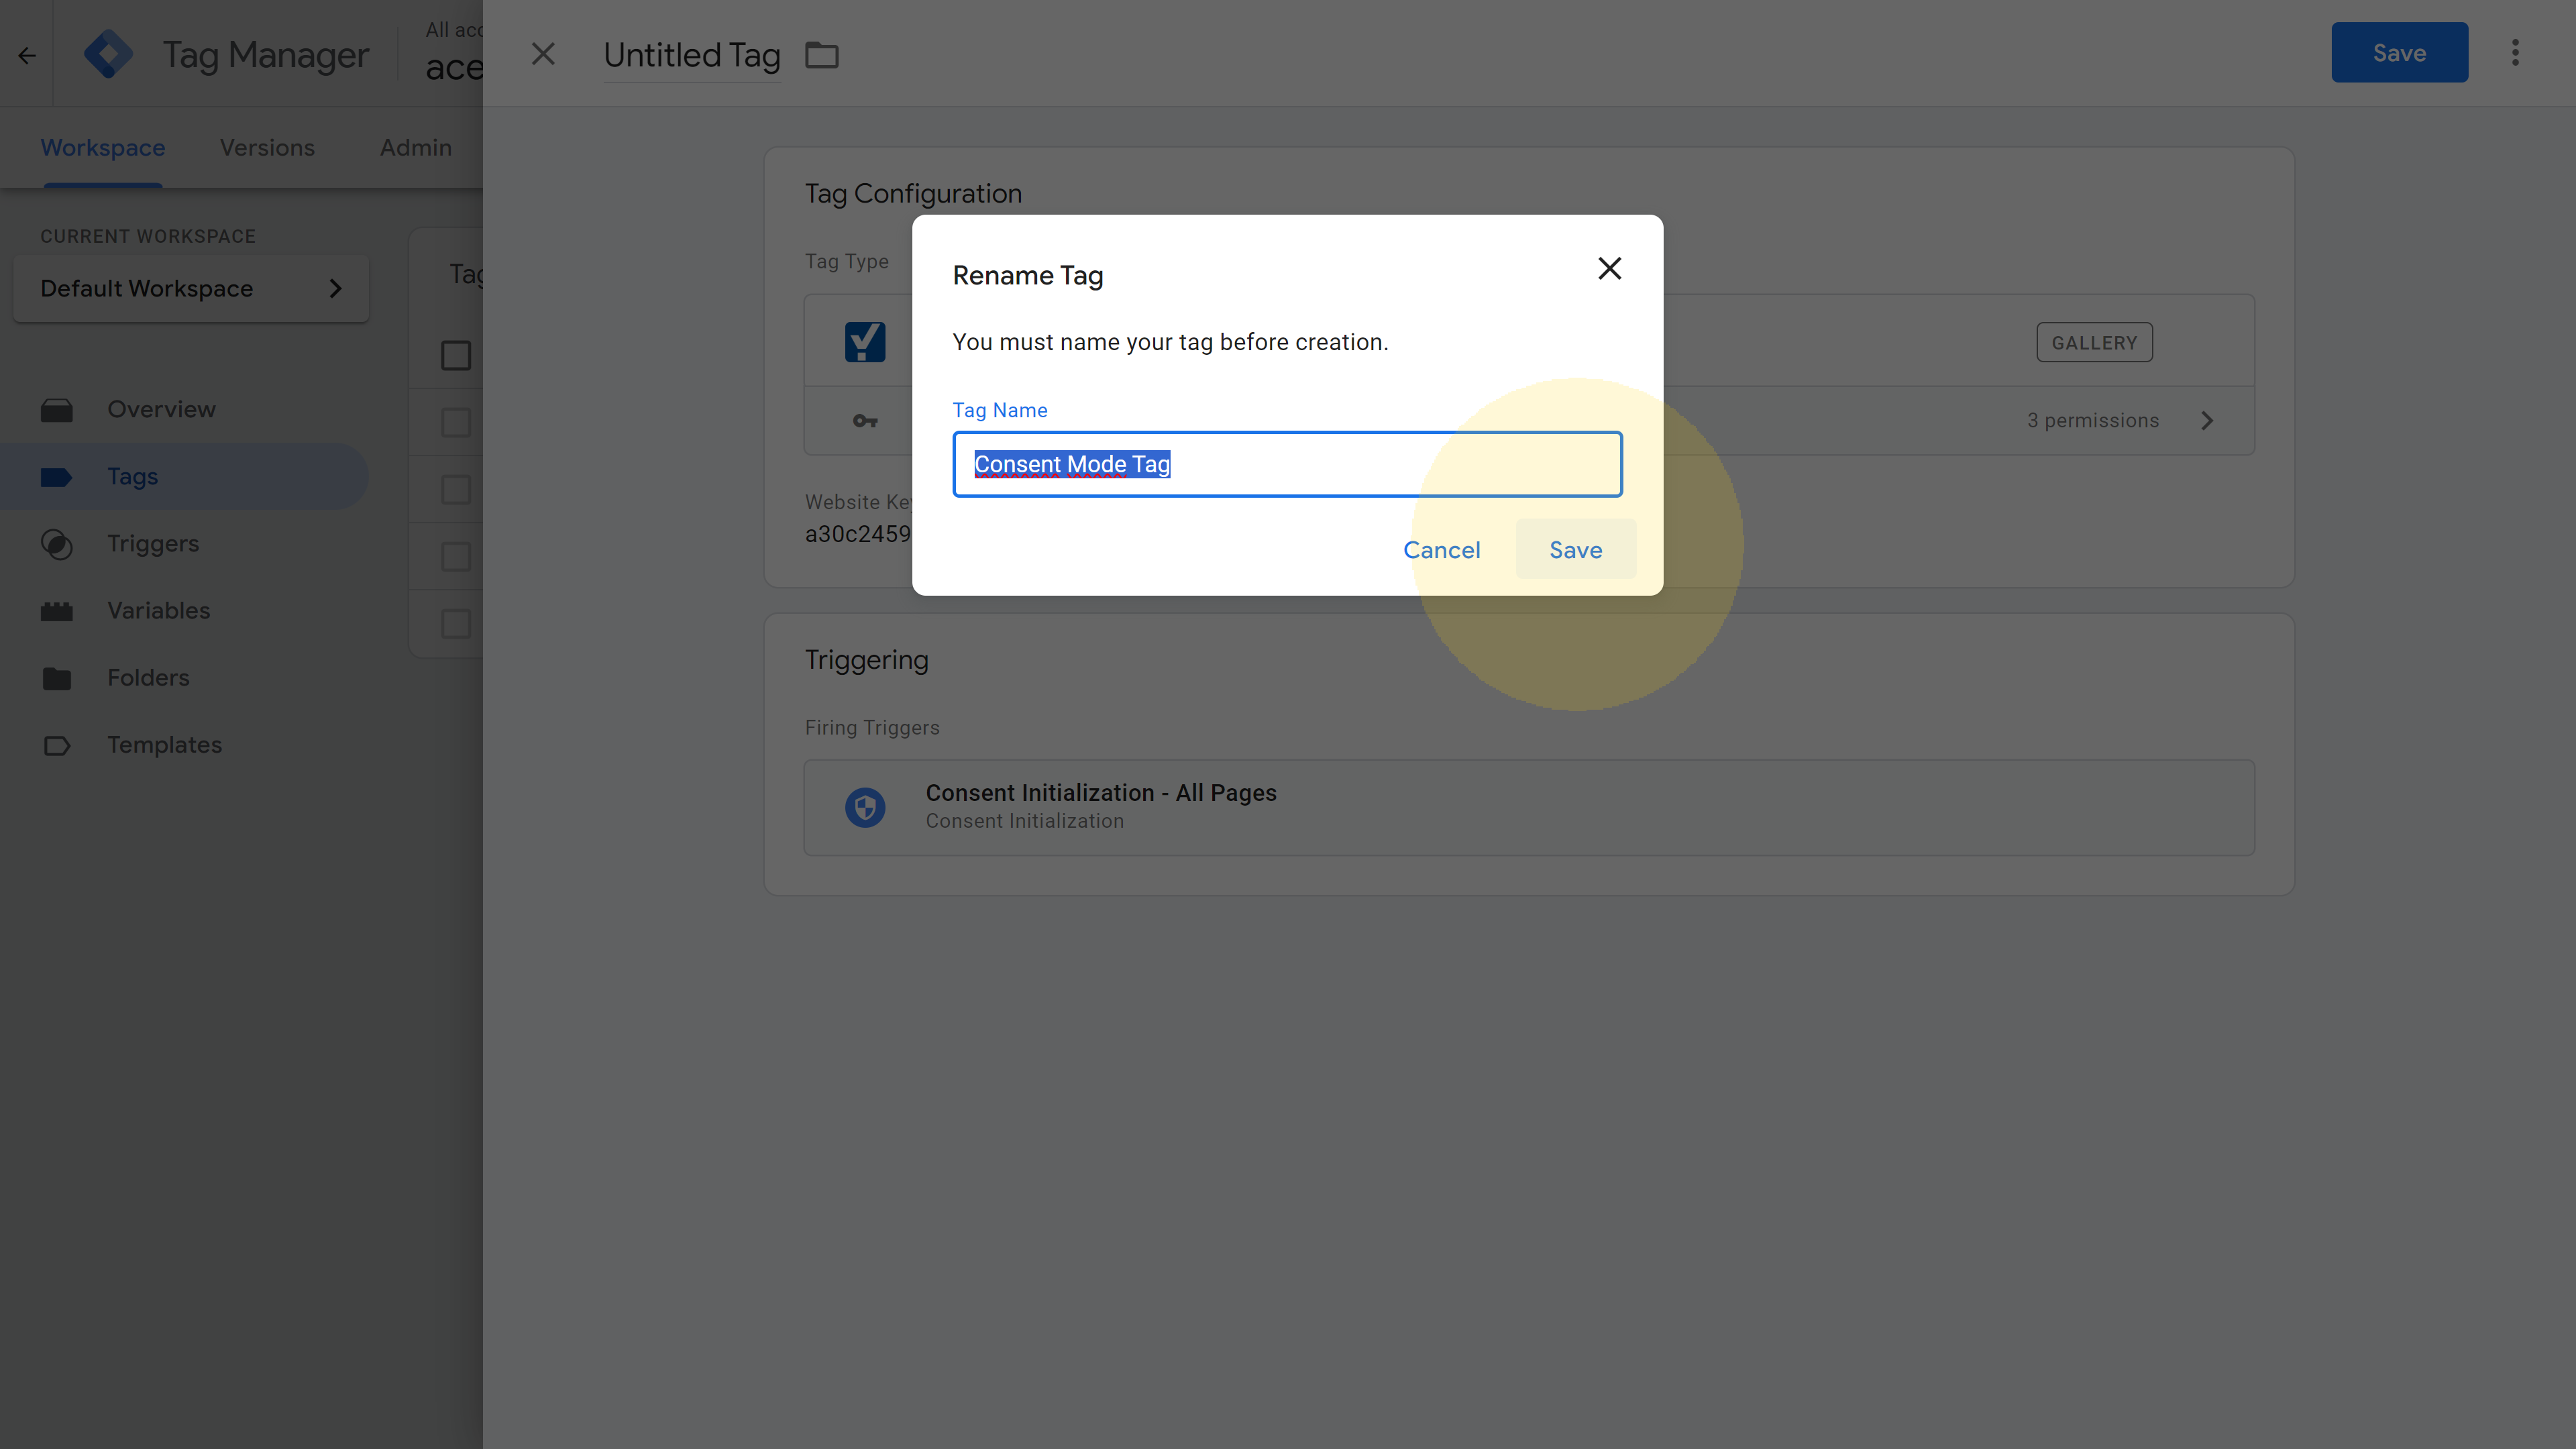
For the triggering event we just need to select the one called Consent Initiallization - All Pages and then Save the new created tag.
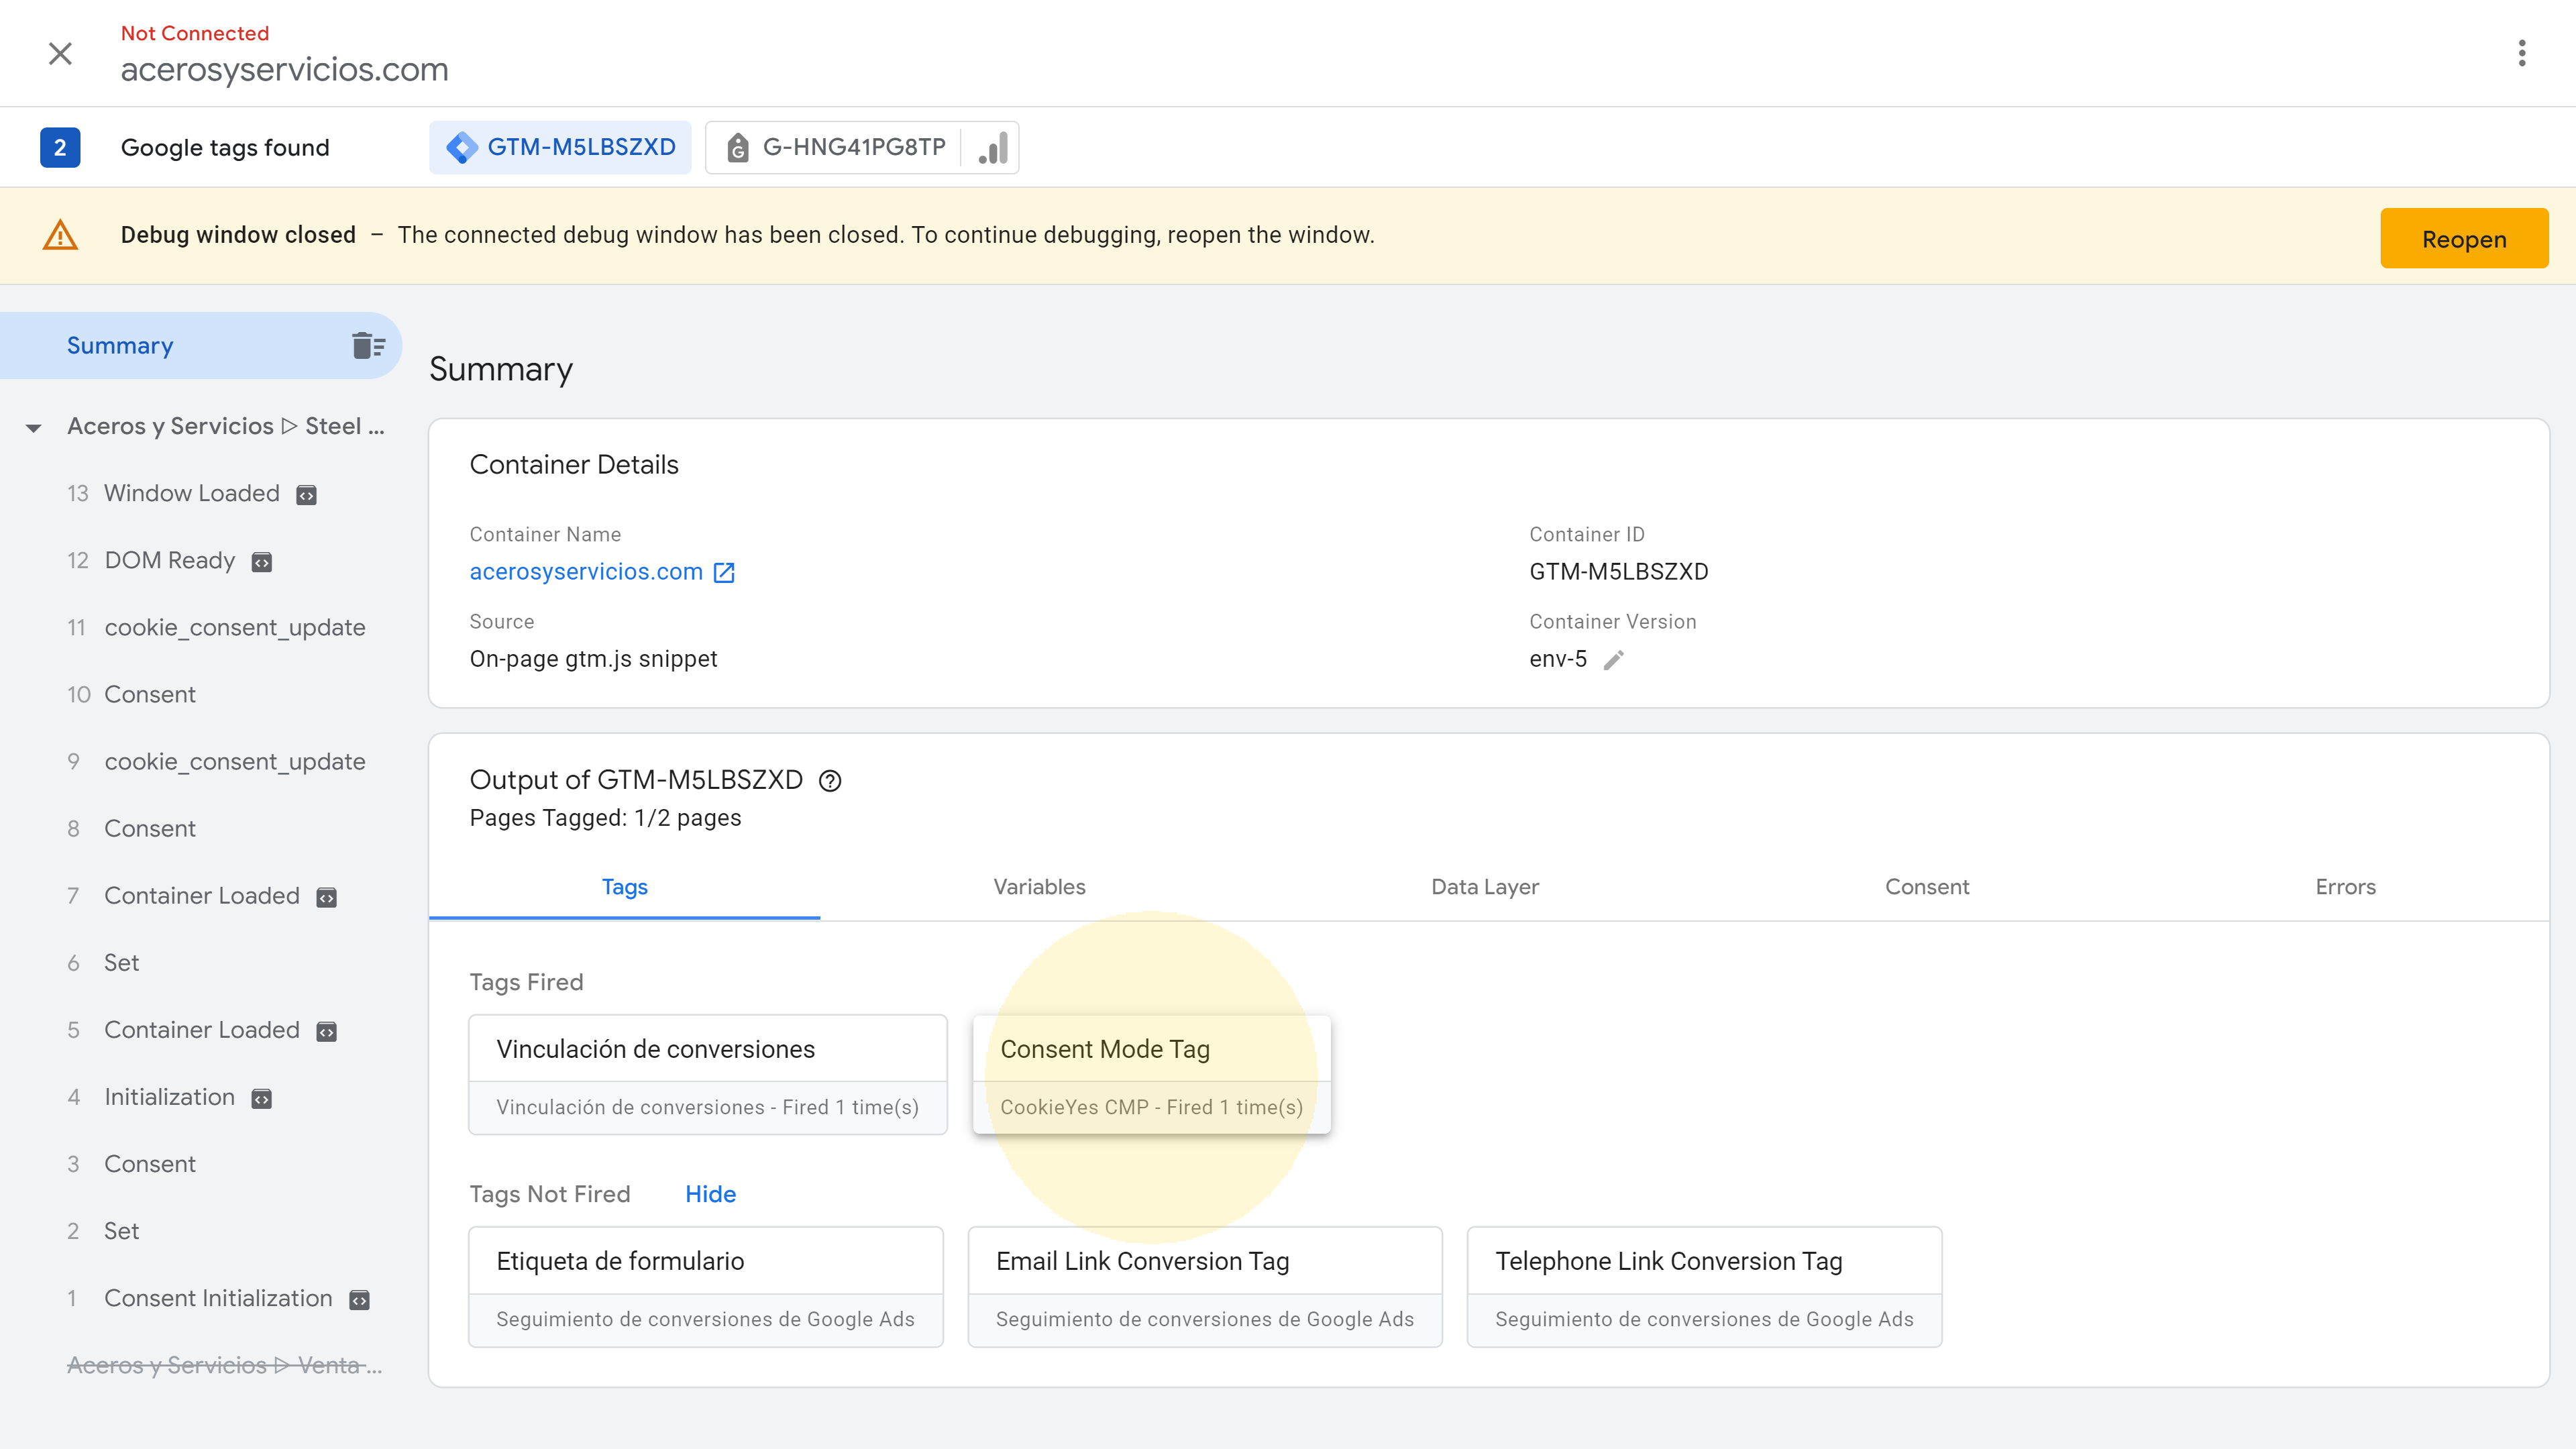
Check that the tag is triggered
With the new tag already added, we just need to press the Preview button to connect a new test session on our website. The cookie banner must then appear, and pressing the Accept All or the Reject All button will be enough to then close the test session and check in the preview summary that the Consent Mode Tag has been fired.
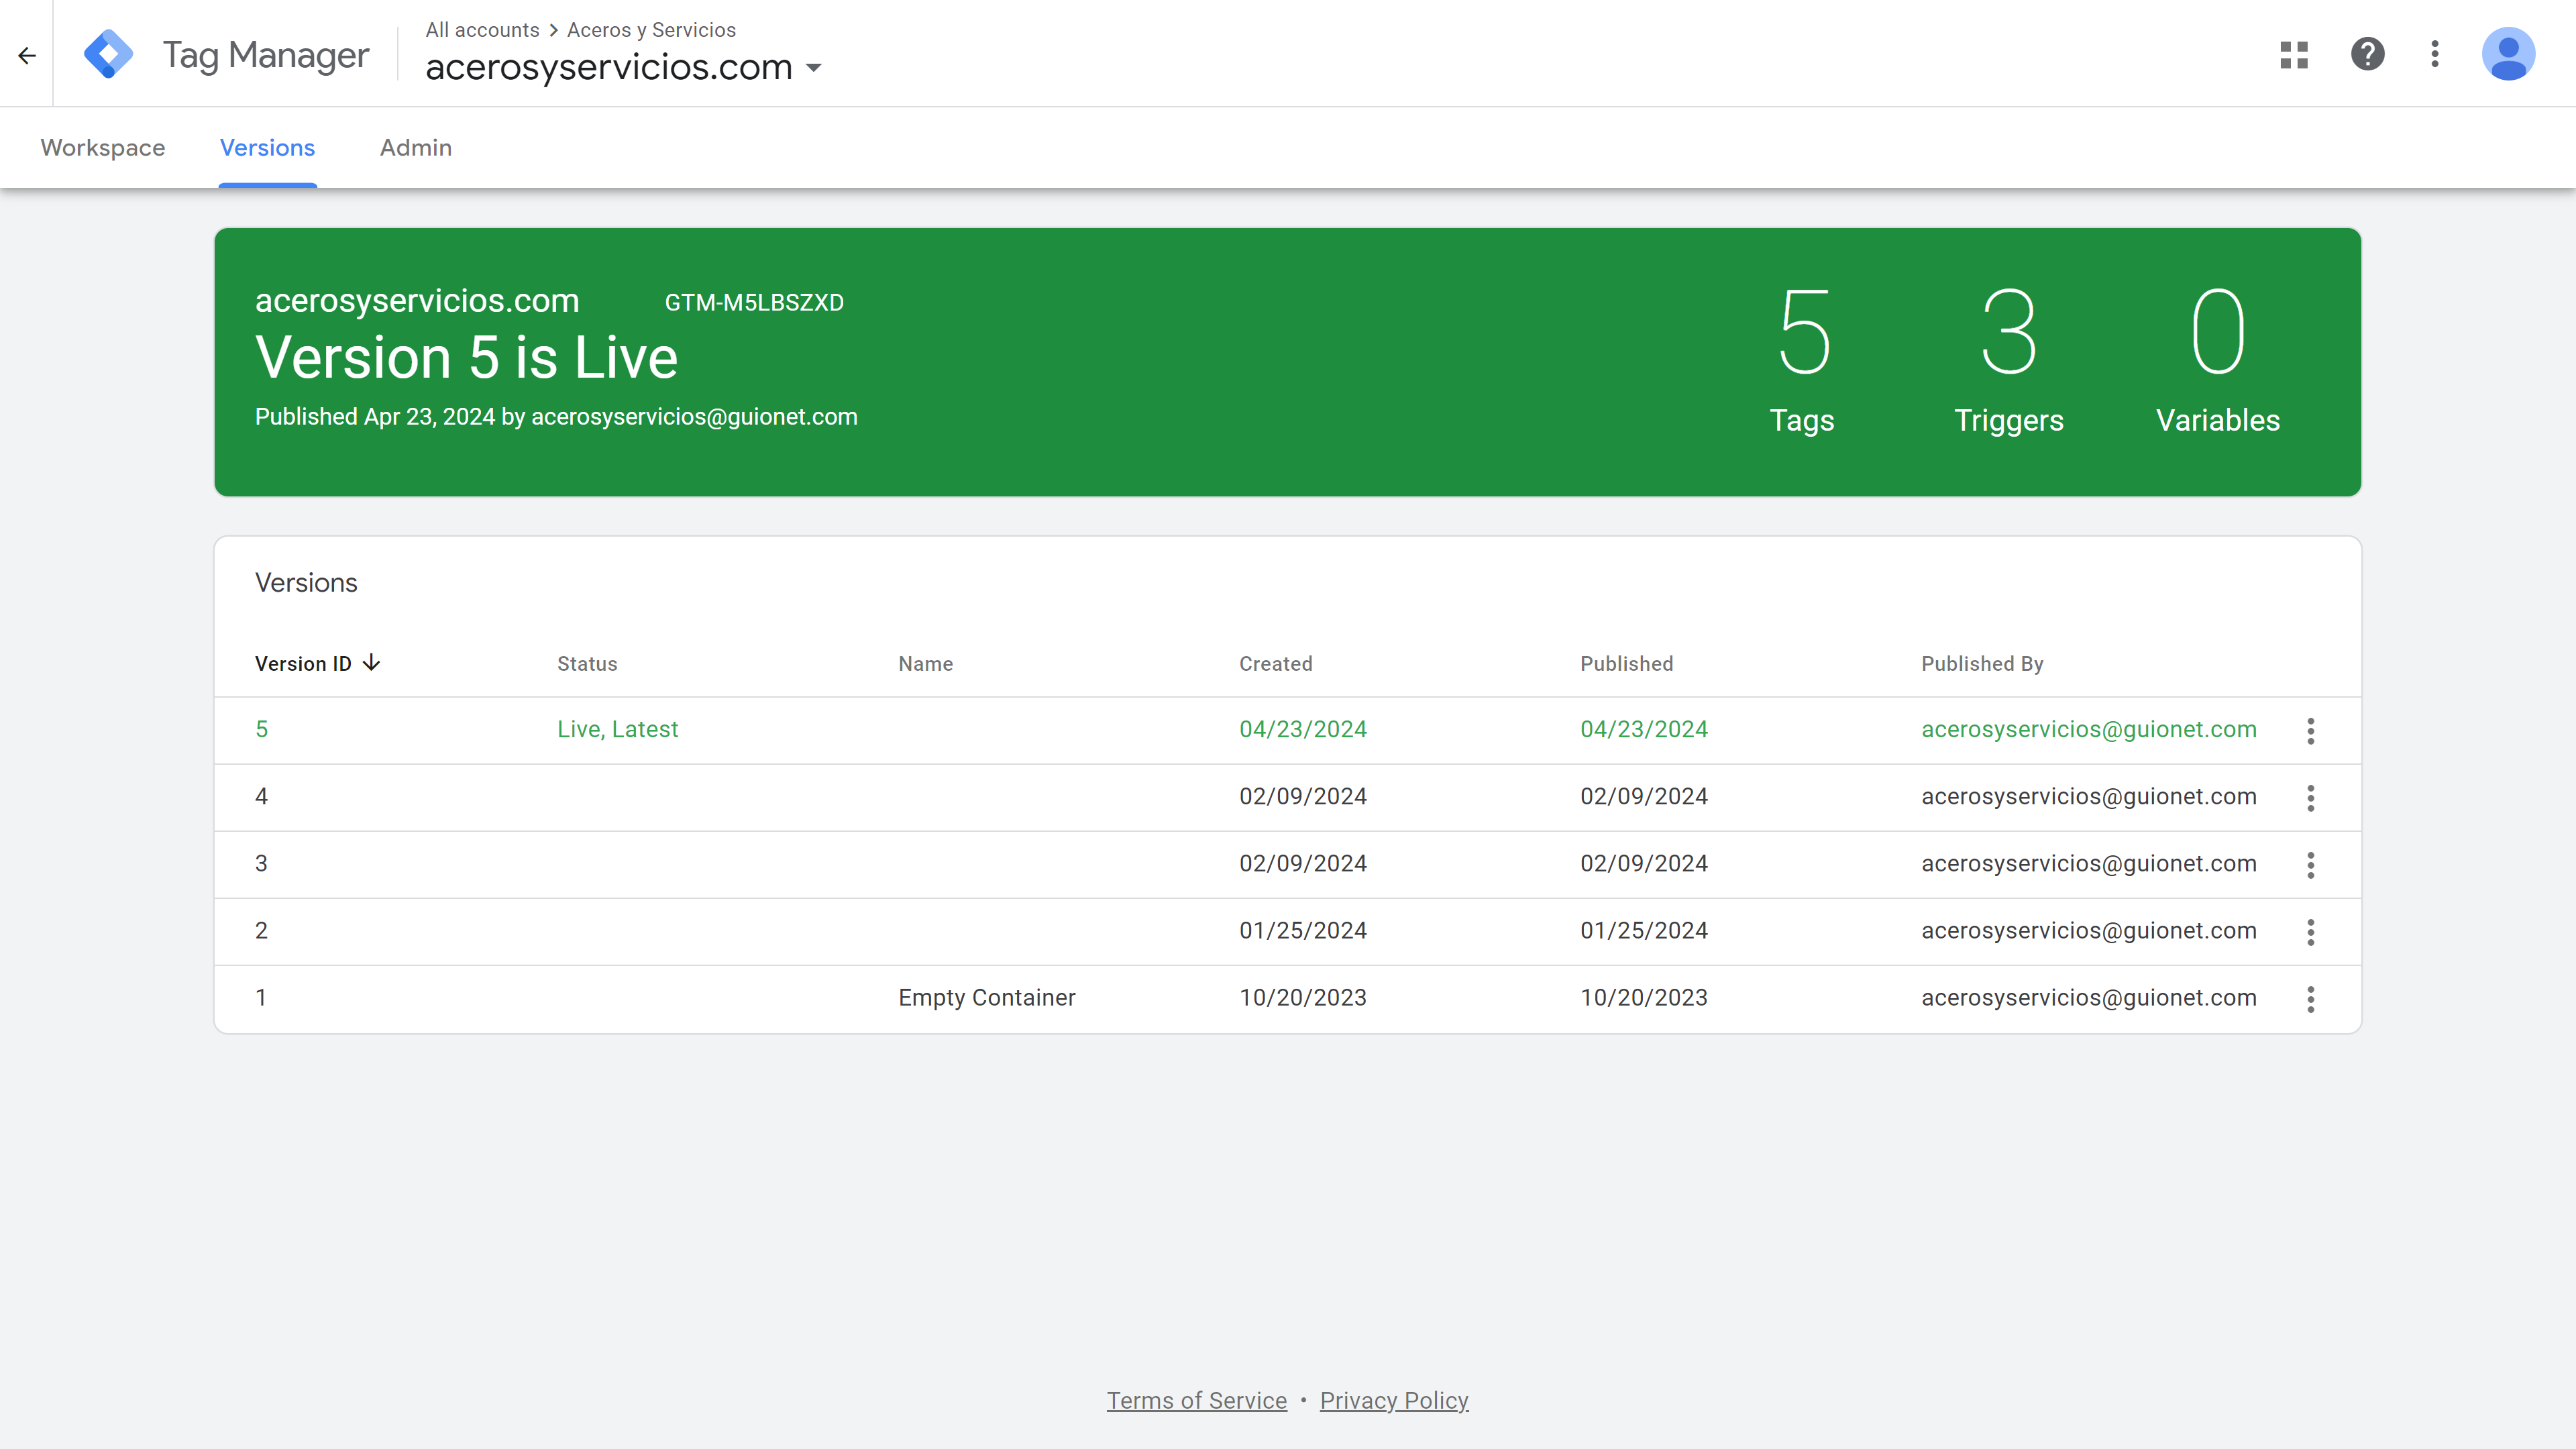
Publish the changes of the Tag Manager account
If everything has gone smoothly, at this point we just need to submit all these changes done to the Google Tag Manager account and apply them to the website for them to start working.
Conclusion
This tutorial is ideal for websites with under 100 pages and fewer than 25,000 monthly pageviews. It’s a tailored solution that meets the needs of smaller websites without compromising on compliance or functionality.
I really hope you find this tutorial helpful. Implementing Google Consent Mode v2 can seem daunting, but with the right tools, it’s quite manageable. I encourage you to try it out, and please, if you have any comments or feedback, don’t hesitate to leave them below. Your input is invaluable as it helps us all learn and grow together.
Thank you for watching, and I look forward to seeing how you implement these strategies on your websites. Don’t forget to like, subscribe, and click the notification bell to stay updated with our latest content. Happy compliance!


Leave a Reply